Turn Trash into Treasure: DIY Upcycled Furniture Projects
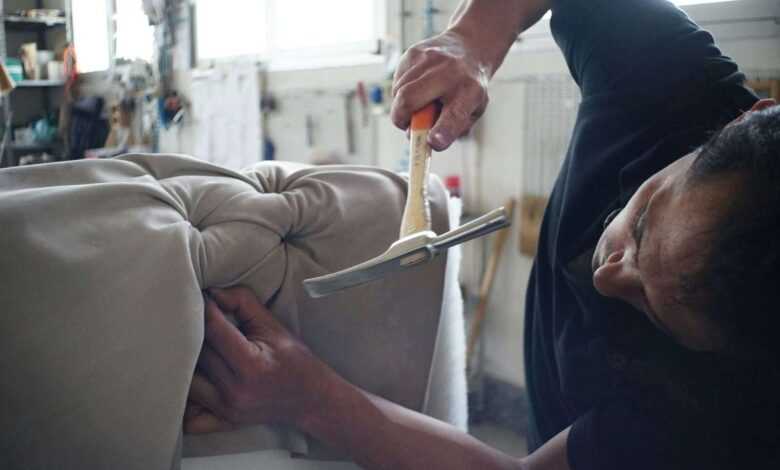
Table of Contents
Ever stare longingly at that discarded dresser, its potential hidden beneath layers of dust and outdated style? Or maybe a forlorn nightstand whispers tales of forgotten grandeur? Well, fret no more, my fellow treasure hunter! Today, we’re embarking on a thrilling journey to transform these forgotten gems into show-stopping masterpieces. Get ready to ditch the “replace” mentality and embrace the magic of upcycled furniture!
Upcycling isn’t just about giving furniture a second life; it’s about unleashing your inner designer, saving a few bucks (and the planet!), and crafting pieces that boast a unique charm you simply can’t find in a store. Whether you’re a seasoned DIY pro or a curious newbie, there’s a place for you in this upcycled haven. We’ll guide you through every step, from sourcing pre-loved furniture to breathing new life into it with paint, hardware, and a sprinkle of creativity.
So, grab your toolbox (and maybe a cup of your favorite beverage for inspiration!), because we’re about to turn that “trash” into a treasure that will be the envy of your friends.

Embracing the Thrill of Upcycled Furniture
1.1 The Allure of Upcycling: Why Give Furniture a Second Life?
Upcycling furniture is an eco-friendly practice that breathes new life into old items, reducing waste and environmental impact. It involves transforming discarded or pre-loved furniture into unique, functional pieces, offering several benefits:
Environmental Benefits: Upcycling reduces landfill waste and the demand for new resources. By reusing materials, we can lower our carbon footprint and conserve natural resources.
Cost-Effectiveness: Upcycled furniture can be much cheaper than buying new. It allows you to create high-quality, custom pieces at a fraction of the cost.
Unique Design Potential: Upcycling gives you the creative freedom to design one-of-a-kind pieces that reflect your personal style. Whether it’s a vintage dresser turned into a chic sideboard or an old door repurposed as a table, the possibilities are endless.
For more on the benefits of upcycling, visit Eco Warrior Princess.
1.2 Upcycled Furniture for Everyone: Targeting Different Skill Levels
Upcycling furniture can be tailored to different skill levels, making it accessible to everyone:
Beginner-Friendly Projects: Simple tasks like painting or adding new hardware can dramatically transform a piece. Start with items like small tables or chairs.
Intermediate Projects: Once you’re comfortable with the basics, try more complex projects like reupholstering a chair or adding decoupage designs.
Advanced Techniques: For those with more experience, techniques like advanced woodworking, mixed media projects, and intricate stenciling can create stunning results.
For project ideas based on skill level, visit DIY Network.
1.3 Finding Your Upcycled Treasures: The Hunt for Pre-Loved Furniture
The hunt for pre-loved furniture can be exciting and rewarding. Here are some great places to find pieces to upcycle:
Thrift Stores: These stores are treasure troves of affordable, unique furniture. Look for solid wood pieces that can be easily transformed.
Flea Markets: Flea markets offer a variety of vintage and antique items that are perfect for upcycling.
Online Marketplaces: Websites like Craigslist, Facebook Marketplace, and eBay often have great deals on used furniture.
For tips on finding second-hand furniture, check out The Spruce.
1.4 Gearing Up for Success: Essential Tools and Supplies for Upcycling
Having the right tools and supplies is crucial for successful upcycling projects:
Basic Tools: Start with essentials like a screwdriver, hammer, paintbrushes, and sandpaper.
Safety Considerations: Always wear protective gear such as gloves, goggles, and masks to protect yourself from dust and fumes.
Paint Options: Chalk paint, milk paint, and latex paint are popular choices for furniture. Each type has its own benefits, so choose according to your project needs.
For a comprehensive list of tools and supplies, visit Bob Vila.
Section 2: Unveiling Upcycled Furniture Ideas: A Gallery of Inspiration
2.1 Breathing New Life into Classic Pieces (Dressers, Coffee tables, Chairs)
Classic furniture pieces can be transformed into beautiful, functional items. Here are some ideas:
Dressers: Paint a vintage dresser in bold colors, replace the knobs with modern hardware, or use it as a bathroom vanity.
Coffee Tables: Sand and repaint an old coffee table, add a new top, or turn it into a bench with storage.
Chairs: Reupholster a chair with new fabric, paint it in a fun color, or add stencils for a unique design.
For detailed project ideas, visit Good Housekeeping.
2.2 Transforming Unexpected Finds (Pallets, Suitcases, Old doors)
Unconventional materials can make stunning furniture pieces:
Pallets: Use pallets to create coffee tables, bed frames, or outdoor furniture. Sand them down and add a finish for a polished look.
Suitcases: Vintage suitcases can be turned into stylish side tables or storage ottomans.
Old Doors: Repurpose old doors as headboards, tables, or room dividers. Sand and paint them to match your décor.
For creative ideas using unexpected finds, check out Instructables.
2.3 Upcycled Furniture for Every Room (Bedroom, Living room, Kitchen)
Upcycled furniture can enhance every room in your home:
Bedroom: Create a unique headboard from an old door or pallets, or transform a dresser with paint and new hardware.
Living Room: Upcycle coffee tables, side tables, or entertainment centers. Add storage solutions using repurposed crates or shelves.
Kitchen: Use old cabinets for kitchen islands, create shelving from reclaimed wood, or make bar stools from pallets.
For room-specific upcycling ideas, visit HGTV.
2.4 Budget-Friendly Transformations (Creative solutions, Repurposing everyday items)
Upcycling doesn’t have to be expensive. Here are some budget-friendly ideas:
Creative Solutions: Use leftover paint, fabric, and hardware from previous projects. Look for free items on online marketplaces.
Repurposing Everyday Items: Turn glass jars into storage containers, use old ladders as bookshelves, or convert an old dresser into a kitchen island.
For budget-friendly transformation ideas, visit Family Handyman.
Section 3: Furniture Upcycling for Beginners: A Step-by-Step Guide
3.1 Choosing Your Upcycled Project: Matching Skill Level and Style Preferences
Selecting the right project is crucial for success:
Skill Level: Start with simple projects if you’re a beginner. As you gain confidence, move on to more complex tasks.
Style Preferences: Choose projects that align with your aesthetic. Whether it’s rustic, modern, or vintage, pick pieces that will fit your style.
For project selection tips, visit Better Homes & Gardens.
3.2 Preparing Your Upcycled Piece: Cleaning, Inspection, and Repairs
Proper preparation ensures the best results:
Cleaning: Clean the furniture thoroughly to remove dust, dirt, and grime. Use mild soap and water, and let it dry completely.
Inspection: Check for any damages or structural issues. Make necessary repairs to ensure the piece is stable and safe.
Repairs: Fix any loose joints, replace broken parts, and fill in cracks or holes with wood filler.
For preparation tips, visit This Old House.
3.3 Painting and Finishing Techniques: Achieving a Flawless Look
Achieve a professional finish with these techniques:
Types of Paint: Chalk paint is great for a matte, vintage look; milk paint gives a rustic finish; latex paint is durable and versatile.
Application Techniques: Sand the surface for better paint adhesion. Apply primer if necessary, and use thin, even coats of paint. Sand between coats for a smooth finish.
Creating Unique Finishes: Distress the paint for a vintage look, use stencils for patterns, or add a glaze for depth.
For painting and finishing tips, visit Martha Stewart.
3.4 Hardware Magic: Refreshing Hinges, Knobs, and Handles
Hardware can transform the look of your furniture:
Adding Hardware Accents: Replace old knobs and handles with new, stylish ones. Choose hardware that complements the new look of your piece.
Polished Look: Clean and polish existing hardware to restore its shine. Consider painting it to match your design.
For hardware makeover ideas, visit Apartment Therapy.
Section 4: Beyond the Basics: Advanced Upcycling Techniques
4.1 Decoupage Delights: Adorning Furniture with Decorative Paper
Decoupage adds a unique touch to your furniture:
Decoupage Basics: Choose your paper (e.g., napkins, magazine cutouts), apply a layer of decoupage medium, place the paper, and seal with another layer of medium.
Application Tips: Smooth out wrinkles and bubbles, and apply multiple coats for durability.
For detailed decoupage instructions, visit Mod Podge Rocks.
4.2 Upholstery Adventures: Reupholstering Furniture for Comfort and Style
Reupholstering furniture can give it a new look and extend its life:
Removing Old Fabric: Carefully remove the existing fabric, keeping the pieces intact to use as a pattern.
Adding New Fabric: Cut new fabric to size, stretch it over the furniture, and secure with a staple gun.
For beginner upholstery techniques, visit Sailrite.
4.3 Stenciling and Stencilling: Adding Patterns and Designs
Stenciling is a great way to add patterns and designs to your upcycled furniture:
Choosing Stencils: Select stencils that match your design vision.
Application Techniques: Secure the stencil to the furniture, apply paint with a stencil brush or sponge, and carefully remove the stencil.
4.4 Embracing Mixed Media: Combining Materials for a Unique Look
Mixed media projects can create truly unique pieces:
Combining Materials: Use different materials like wood, metal, fabric, and glass. For example, add metal accents to a wooden table or fabric panels to a bookshelf.
Creating a Cohesive Design: Ensure that the different materials complement each other and fit the overall aesthetic of the piece.
For mixed media project ideas, visit Mixed Media Club.
Section 5: Breathe Easy: Eco-Friendly Upcycling Practices
5.1 Choosing Sustainable Materials: Opting for Eco-friendly Paints and Finishes
Eco-friendly materials are better for you and the environment:
Eco-friendly Paints: Look for paints with low or no VOCs (volatile organic compounds). Brands like Benjamin Moore’s Natura and Sherwin-Williams’ Harmony offer eco-friendly options.
Natural Finishes: Use natural oils and waxes instead of synthetic finishes. Linseed oil, beeswax, and tung oil are good choices.
For more on sustainable paints and finishes, visit Green Building Supply.
5.2 Repurposing Everyday Items: Giving New Life to Discarded Materials
Everyday items can be transformed into functional and decorative furniture:
Glass Jars: Turn glass jars into storage containers, candle holders, or plant pots.
Old Ladders: Use old ladders as bookshelves, towel racks, or plant stands.
Wooden Crates: Stack and secure wooden crates to create shelves, coffee tables, or storage units.
For ideas on repurposing everyday items, visit Upcycle That.
5.3 Minimizing Waste: Responsible Disposal and Upcycling Leftovers
Minimize waste during your upcycling projects:
Use Leftovers: Incorporate leftover materials from previous projects. For example, use paint scraps for smaller items or combine fabric remnants for a patchwork design.
Responsible Disposal: Properly dispose of any waste materials. Recycle metal and plastic parts, and donate usable materials to local charities or recycling centers.
For tips on minimizing waste, visit Earth911.
5.4 Supporting Local: Sourcing Materials from Second-Hand Stores and Local Businesses
Support local businesses while sourcing materials for your upcycling projects:
Thrift Stores: Shop at local thrift stores for affordable, pre-loved furniture and materials.
Local Suppliers: Purchase eco-friendly paints and finishes from local suppliers to support small businesses.
Community Events: Attend local garage sales, flea markets, and community swaps to find unique items.
For a directory of local thrift stores, visit The Thrift Shopper.
Section 6: Troubleshooting Your Upcycled Project: Solutions for Common Hiccups
6.1 Uneven Paint Application: Strategies for Achieving a Smooth Finish
Achieving a smooth paint finish can be challenging:
Preparation: Sand the surface thoroughly to ensure even paint adhesion. Use a primer to create a smooth base.
Application: Apply thin, even coats of paint, and sand lightly between coats. Use a high-quality brush or roller for a smooth finish.
Troubleshooting: If the paint is uneven, sand the affected area and reapply the paint in thin layers.
For more painting tips, visit DIY Painting Tips.
6.2 Wobbly Furniture: Stabilizing and Reinforcing Upcycled Pieces
Stabilizing wobbly furniture ensures safety and functionality:
Tightening Joints: Check all joints and tighten any loose screws or bolts. Add wood glue for extra stability.
Reinforcement: Add braces or supports to weak areas. Use metal brackets or wooden reinforcements for added strength.
For tips on stabilizing furniture, visit Wood Magazine.
6.3 Hardware Mishaps: Replacing or Repairing Broken Hinges and Knobs
Dealing with broken hardware can be frustrating:
Replacing Hardware: Find replacements that match the style and size of the original hardware. Install new hinges, knobs, or handles securely.
Repairing Hardware: If replacement isn’t possible, try repairing the existing hardware. Use strong adhesive for small breaks, or find matching parts to replace broken pieces.
For hardware repair tips, visit Home Repair Tutor.
6.4 Safety First: Addressing Safety Concerns During Upcycling Projects
Safety should always be a priority during upcycling projects:
Protective Gear: Wear gloves, goggles, and masks to protect yourself from dust, fumes, and chemicals.
Ventilation: Work in a well-ventilated area to avoid inhaling harmful fumes from paints and finishes.
Safe Practices: Use tools correctly and keep your workspace organized to prevent accidents.
For safety tips, visit OSHA.
Section 7: Flaunt Your Creations: Sharing the Joy of Upcycled Furniture
7.1 Style Your Upcycled Masterpiece: Integrating Upcycled Furniture into Your Home Decor
Show off your upcycled pieces by incorporating them into your home décor:
Matching Styles: Choose pieces that complement your existing décor. Blend different styles for an eclectic look.
Highlighting Features: Make your upcycled furniture the focal point of the room. Arrange other items to draw attention to your creation.
For styling tips, visit Houzz.
7.2 Throwing an Upcycled Furniture Party: Sharing Your Upcycling Passion with Friends
Host an upcycling party to share your passion with others:
Event Planning: Invite friends to bring their own upcycling projects. Provide materials and tools for a collaborative experience.
Showcase Creations: Display your upcycled pieces and encourage others to do the same. Share tips and techniques to inspire new projects.
For party planning ideas, visit Real Simple.
7.3 Selling Your Upcycled Treasures: Turning Your Hobby into a Side Hustle
Turn your upcycling hobby into a profitable venture:
Online Marketplaces: Sell your creations on platforms like Etsy, eBay, and Facebook Marketplace. Create appealing listings with high-quality photos and detailed descriptions.
Local Markets: Participate in local craft fairs, flea markets, and community events to reach a wider audience.
Marketing: Use social media to promote your upcycled furniture. Share your process, before-and-after photos, and customer testimonials.
For selling tips, visit Etsy Seller Handbook.
7.4 Upcycling Inspiration Online: Finding a Community of Upcycling Enthusiasts
Join online communities to connect with other upcycling enthusiasts:
Forums and Groups: Participate in online forums and social media groups dedicated to upcycling. Share ideas, get feedback, and find inspiration.
Blogs and Websites: Follow blogs and websites that focus on upcycling for new project ideas and tips.
For online communities, visit Upcycle That.
Section 8: The Final Note: Upcycling – More Than Just Furniture
8.1 Embracing the Upcycled Lifestyle: Expanding Your Upcycling Horizons
Upcycling goes beyond furniture; it’s a lifestyle:
Household Items: Upcycle everyday items like glass jars, tin cans, and fabric scraps into functional and decorative pieces.
Clothing and Accessories: Transform old clothing into new fashion pieces or accessories. For example, turn jeans into a tote bag or T-shirts into a quilt.
For more lifestyle upcycling ideas, visit DIY Joy.
8.2 Sustainable Swaps for Everyday Items: Upcycling Clothing, Accessories, and More
Make sustainable swaps by upcycling everyday items:
Clothing: Repair or alter old clothing to extend its life. Turn T-shirts into reusable shopping bags or jeans into shorts.
Accessories: Create unique accessories from discarded materials. Use old jewelry parts to make new pieces or repurpose fabric scraps into hair accessories.
For sustainable fashion ideas, visit Sustain Your Style.
8.3 The Upcycled Mindset: Cultivating Resourcefulness and Creativity in Everyday Life
Adopting an upcycled mindset encourages resourcefulness and creativity:
Resourcefulness: Look for opportunities to repurpose items instead of discarding them. Think creatively about how everyday objects can be transformed.
Creativity: Use upcycling as a creative outlet. Experiment with different materials and techniques to create unique, personalized items.
For inspiration on cultivating an upcycled mindset, visit The Good Trade.
8.4 Join the Upcycled Movement: Advocating for Sustainability and Eco-Conscious Living
Become an advocate for sustainability and eco-conscious living through upcycling:
Environmental Benefits: Promote the environmental benefits of upcycling to others. Share your knowledge and encourage others to try upcycling.
Community Involvement: Get involved in local or online upcycling communities. Participate in events, workshops, and challenges to spread awareness.
For more on advocating for sustainability, visit Earth Day.
Resources for the Upcycling Enthusiast
Online Tutorials and Video Guides: Websites like YouTube and Instructables offer
countless tutorials on upcycling projects.
Upcycling Books and Magazines: Titles like “Furniture Makeovers” by Barb Blair and magazines like “GreenCraft” provide inspiration and step-by-step guides.
Online Upcycling Communities: Join forums and groups on platforms like Facebook, Reddit, and Pinterest dedicated to upcycling.
Sustainable Paint and Finish Brands: Brands like EcoS Paints and Annie Sloan offer eco-friendly options.
Local Thrift Stores and Second-Hand Shops: Use directories like The Thrift Shopper to find local thrift stores and second-hand shops for sourcing materials.
FAQ: Unleash Your Inner Upcycling Guru – Your Upcycled Furniture Journey Starts Here!
We’ve explored the exciting world of DIY upcycled furniture projects, but you might still have some questions. Fear not, curious crafter! This FAQ section tackles 10 top questions that might be swirling in your head. So, let’s dive in and ensure your upcycling adventure is a roaring success!
1. Where can I find furniture to upcycle?
Thrift stores, flea markets, online marketplaces like Facebook Marketplace, and even garage sales are treasure troves for upcyclable furniture! Don’t be afraid to think outside the box. Old crates, pallets, or even suitcases can be transformed into unique pieces.
2. What tools do I need to get started?
The good news is you don’t need a fancy workshop! Basic tools like a screwdriver, sandpaper, paintbrushes, and a drop cloth are a great starting point. Depending on your project, you might need additional tools like a staple gun or a drill.
3. I’m a complete beginner. What kind of upcycled furniture project should I try?
Start simple! Look for furniture with clean lines and minimal damage. A classic dresser or nightstand is a perfect beginner project. You can focus on painting and updating the hardware for a dramatic transformation.
4. What kind of paint should I use for upcycled furniture?
Chalk paint is a popular choice for beginners because it requires minimal prep work. However, explore options like milk paint or mineral paint for different finishes. Consider using eco-friendly paint brands whenever possible!
5. How do I avoid uneven paint application?
Proper preparation is key! Thoroughly clean the furniture and sand down any rough spots. Apply multiple thin coats of paint instead of one thick coat to avoid drips and unevenness.
6. My furniture feels wobbly. How can I make it sturdier?
Check for loose screws or joints and tighten them with a screwdriver. Depending on the damage, you might need to add wood glue or L-brackets for additional reinforcement.
7. The hardware on my furniture is outdated. What can I do?
Replacing old knobs and handles with something new can completely transform a piece. Explore thrift stores or online retailers for unique hardware finds that match your style.
8. Is upcycling furniture safe?
Generally, yes! However, be cautious of furniture with peeling lead paint, especially if you plan to sand it down. If you’re unsure, lead paint test kits are readily available.
9. Can I sell my upcycled furniture?
Absolutely! Online marketplaces like Etsy or local craft fairs are great platforms to showcase your upcycled creations. Just ensure proper pricing and high-quality photos to attract potential buyers.
10. Where can I find more upcycling inspiration?
The internet is your oyster! YouTube channels dedicated to DIY furniture makeovers are a great resource. Social media platforms like Instagram and Pinterest offer endless inspiration and connect you with a vibrant upcycling community.
With these FAQs in your back pocket, you’re well on your way to embarking on a successful DIY upcycled furniture adventure. So, grab your tools, unleash your creativity, and get ready to transform those pre-loved pieces into stunning works of art!
High fives all around! You’ve successfully navigated the world of DIY upcycled furniture projects. You’ve transformed a cast-off piece into a work of art, injected some sustainability into your life, and maybe even discovered a hidden creative talent along the way. Now, it’s time to celebrate!
Flaunt your masterpiece! Style it in your home, proudly showcase it on social media, or even throw an “Upcycled Furniture Party” to inspire your friends. Remember, upcycled furniture is a conversation starter – a chance to share your passion for sustainability and unique design.
But the journey doesn’t end here! Keep exploring! Upcycle other items – clothing, accessories, even old jars! Embrace the upcycled lifestyle, share your creations, and inspire others to join the movement. After all, a little creativity and resourcefulness can go a long way in creating a beautiful and sustainable home (and maybe even a side hustle!). So, keep upcycling, keep creating, and keep transforming the world one pre-loved piece at a time!


