

Direct Answer: A hiking endurance training plan is a structured conditioning schedule that builds mountain stamina by training two distinct physiological adaptations: conditioning two distinct physiological adaptations: Zone 2 aerobic mitochondrial efficiency to sustain continuous uphill climbs and eccentric muscular endurance in the quadriceps, calves, and glutes to absorb punishing downhill braking forces. To prevent chronic overuse injuries such as patellofemoral pain syndrome (hiker’s knee) and Achilles tendinitis, progression must adhere strictly to the 10% Volume Overload Rule: never increment weekly trail mileage or vertical ascent by more than 10% from the previous week. A complete conditioning cycle incorporates four weekly pillars: (1) midweek continuous stair or incline treadmill intervals (10–12% grade), (2) functional unilateral leg strength (weighted step-ups and eccentric step-downs), (3) a progressive weekend long hike with gradual pack-weight loading (+2 to 3 lbs/week), and (4) structured active recovery mobility. For a foundational introduction, explore our 4-week beginner hiking endurance plan.
Interactive Hiking Endurance & Training Plan Generator
Select your current baseline fitness, your upcoming trail objective, and your target timeline to generate a fully customized, week-by-week progressive conditioning schedule complete with interactive workout checkboxes and printable export.
Hiking Endurance & Training Plan Generator
Generates an evidence-based 4-to-8 week progressive conditioning schedule tailored to your current fitness, target trail objective, stair intervals, and pack-weight progressions.
Related Trail Tools & Guides
Convert your smartwatch daily steps into true mountain trail miles based on terrain slope and surface.
Estimate your trail walking time and pace using slope angles and elevation ascent.
Read our in-depth foundational training guide for beginner mountain hikers.
1. The Two Engines of Mountain Endurance: Cardiovascular vs. Muscular
The primary mistake beginner hikers make when preparing for a mountain trek is assuming that generic running or cycling automatically translates to effortless trail climbing.
Low-intensity steady movement trains your body to burn fat for fuel, conserving glycogen so you can hike for hours without hitting the wall.
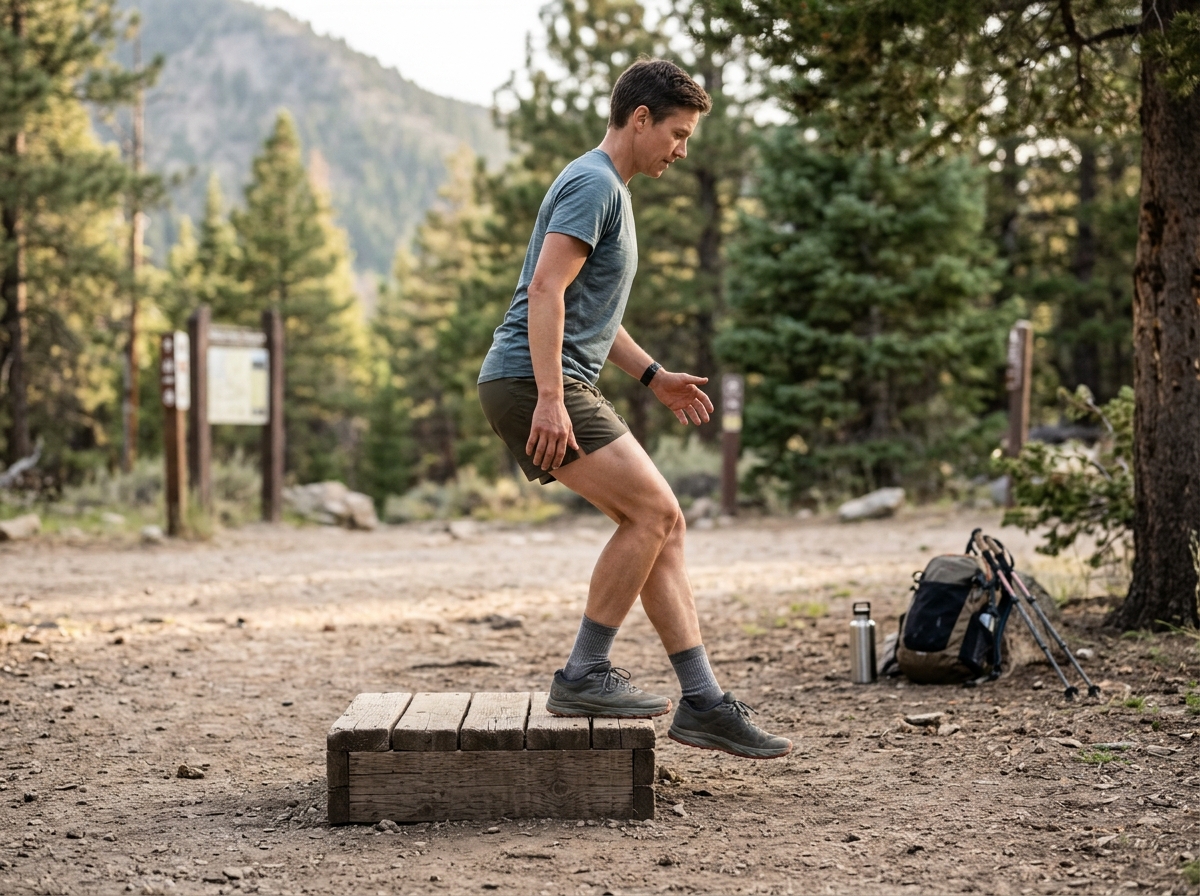
Uphill steps load quadriceps and calves, while downhill descents require eccentric braking. Pack weight trains core and back stabilizers.
- Aerobic base: Walk at a pace where you can breathe comfortably through your nose.
- Uphill strength: Climb stairs or inclined paths to strengthen legs.
- Downhill preparation: Step down deliberately to condition knees and tendons for mountain descents.
According to the American College of Sports Medicine (ACSM): “Cardiovascular endurance and mitochondrial density develop most efficiently through sustained submaximal Zone 2 aerobic stimulus (60–70% of maximum heart rate). This foundational adaptation enables trail athletes to metabolize lipids efficiently and clear blood lactate continuously over multi-hour mountain ascents.”
Engine 1: The Aerobic Foundation (Zone 2 Heart Rate)
Hiking a sustained 2,000-foot climb is an aerobic endurance event lasting multiple hours. If your heart rate spikes into Zone 4 or Zone 5 (anaerobic threshold), your muscle fibers rapidly consume finite glycogen stores, producing metabolic byproducts that lead to heavy legs and the dreaded “bonk” within 45 minutes.
- The Zone 2 Target: Train at 60% to 70% of your maximum heart rate. At this intensity, you can hold a spoken conversation without gasping for breath.
- Why It Matters: Zone 2 training stimulates capillary beds in slow-twitch muscle fibers, dramatically increasing your body’s ability to clear lactate and burn fatty acids as fuel.
Research published in Wilderness & Environmental Medicine notes: “Downhill mountain descents generate ground reaction forces exceeding 300% to 400% of body weight with each stride, placing extreme eccentric demands on the quadriceps. Without targeted eccentric preconditioning, rapid muscle micro-damage destabilizes patellar tracking and significantly increases acute trail slip risks.”
Engine 2: The Eccentric Contraction Trap (Why Descents Cause Agony)
When climbing uphill, your quadriceps and calves contract concentrically (shortening under tension to propel you upward). However, when descending downhill, your quadriceps undergo eccentric contractions (lengthening under load to brake your forward momentum).
- Eccentric contractions produce significantly higher mechanical tension per muscle fiber than concentric actions.
- This tension causes microscopic tears in the sarcolemma, resulting in severe Delayed Onset Muscle Soreness (DOMS) and inflammation 24 to 48 hours post-hike.
- The Solution: Your training plan must deliberately incorporate stair descents and eccentric step-down exercises, rather than only climbing up!
2. The 10% Overload Rule: Protecting Tendons & Ligaments
Muscle tissue adapts to physical stress relatively quickly (within 2 to 4 weeks) because muscles enjoy rich vascular blood flow. In contrast, tendons, ligaments, and articular cartilage have minimal vascularity and require 8 to 12 weeks of gradual progressive loading to remodel tensile collagen fibers.
- Weeks 1 to 3: Increase mileage and elevation gain by no more than 10% each week.
- Week 4: Drop volume by 25% to allow joint and tendon recovery.
- Week 5 and beyond: Step up to a new peak feeling refreshed and adapted.
Clinical sports medicine consensus (British Journal of Sports Medicine): “Because tendons, ligaments, and articular cartilage possess minimal vascular perfusion compared to muscle tissue, collagen fiber remodeling requires 8 to 12 weeks of gradual progressive loading. Adhering to the 10% volume ceiling protects structural tissues against chronic tendinopathy and patellofemoral pain.”
The Rules of Safe Progression
- Never Spike Mileage and Vertical Concurrently: If you increase your weekend long hike from 5 miles to 7 miles (+40%), keep the vertical gain flat. If you double your vertical gain, shorten the route distance.
- The 10% Boundary: Limit total weekly volume increases to no more than 10% over the preceding week.
- Scheduled Deload Weeks: In any 6-to-8 week conditioning program, schedule a deload week at Week 5 or Week 6. Dropping volume by 25% to 30% allows connective tissue supercompensation and replenishes nervous system fatigue before the final summit push.
3. Periodized Pack-Weight Progression (Rucking for Hikers)
Carrying a loaded backpack shifts your center of gravity upward and backward, compressing lumbar vertebrae and multiplying impact force across the knees with every step. Jumping directly from daypack hiking into a 35-pound backpacking weekend is a guaranteed recipe for knee bursitis and shoulder impingement.
According to the National Strength and Conditioning Association (NSCA): “Carrying an external pack shifts the wearer’s center of mass upward and posterior, significantly elevating compressive spinal forces on vertebrae L4–S1 and increasing metabolic expenditure by ~3.5% per kilogram added. Progressive load increments must be capped at 2 to 3 lbs per week to preserve kinetic chain alignment.”
Water as Ballast: Always use water bottles or hydration bladders as pack training weights. If you find yourself exhausted or experiencing knee pain at the summit of your training hill, you can simply dump the water out and hike downhill unweighted, eliminating joint stress on the descent!
4. Master 8-Week Hiking Endurance Reference Matrix
The progression below demonstrates how a casual day hiker safely scales from a 3-mile local path to a strenuous 10-mile mountain summit over an 8-week cycle:
5. Urban & Flatland Training Strategies
What if you live in the Midwest, Florida, or a sprawling metropolitan area with zero mountain elevation within a 3-hour drive? You can still build elite mountain hiking stamina using three urban substitutions:
1. The High-Rise Stairwell or Stadium Bleachers
- Find an office building stairwell, parking garage, or local high school stadium bleachers.
- Perform continuous stair ascents for 30 to 45 minutes, walking briskly up two steps at a time to recruit glutes.
- Crucial Rule: Walk down the stairs slowly and deliberately under control. Do not jog or jump down stairs; emphasize eccentric quad loading on each step.
2. High-Incline Treadmill Hiking
- Set gym treadmills to 12% to 15% incline and speed to 2.5 to 3.0 mph.
- Never hold onto the handrails: Holding the handrails removes your body weight from the incline, reducing the cardiovascular workload by up to 30% and training unnatural posture.
- Wear your loaded daypack on the treadmill to condition your shoulder traps and lower back.
3. Unilateral Eccentric Step-Downs
- Stand sideways or forward on a 6-to-8 inch wooden plyo box or stair step.
- Slowly lower one heel toward the floor over a 3-to-4 second eccentric count, bending the standing knee while keeping your hips level.
- Touch the heel lightly to the ground and press back up. Perform 3 sets of 12 reps per leg. This is the single most effective exercise for preventing downhill knee pain on the trail.
6. Frequently Asked Questions
How long does it take to build hiking endurance?
For beginners starting from a sedentary lifestyle, it takes 4 to 6 weeks of consistent training to build the cardiovascular stamina needed for 5-mile day hikes with moderate hills. For strenuous 10-mile mountain peaks or multi-day backpacking trips, plan for an 8-to-12 week structured progression to condition tendons and leg muscles safely.
How do you train for a steep hike without mountains?
You can build mountain conditioning on flat ground by combining three exercises: (1) stair climber or stadium bleacher sessions, (2) treadmill walks at a 12% to 15% incline at 2.5–3.0 mph without holding handrails, and (3) loaded rucking (walking with a 15–25 lb weighted pack) around local neighborhoods.
What is the 10 percent rule in hiking training?
The 10 percent rule dictates that you should never increase your total weekly hiking distance or vertical elevation gain by more than 10% from the previous week. Adhering to this boundary allows ligaments, tendons, and cartilage sufficient time to adapt to progressive overload, preventing overuse injuries like tendonitis and runner’s knee.
Is walking on a flat treadmill enough to prepare for mountain hiking?
No. Flat walking trains only concentric muscle actions and fails to engage the glutes, calves, and stabilizing hip muscles required for climbing. Crucially, flat walking completely skips the eccentric quad conditioning needed to brake on mountain descents, leading to severe knee strain and muscle failure on real trails.
Should I lift weights to improve my hiking endurance?
Yes. Strength training twice a week dramatically enhances trail endurance. Focus on unilateral leg exercises (single-leg step-ups, Bulgarian split squats, walking lunges, and calf raises) and core stabilization (planks, bird-dogs). Strong glutes and core muscles take pressure off your knees during long climbs.
Why do my knees hurt when hiking downhill?
Downhill knee pain (often patellofemoral pain syndrome or IT-band friction) occurs because descending forces your quadriceps into repeated eccentric contractions, absorbing up to 3 to 4 times your body weight on every step. Weak glutes and lack of downhill conditioning allow the kneecap to track improperly against the femur.
7. Sports Medicine Evidence, Expert Attribution & Safety Guidelines
- Sports Science & Clinical Provenance: Conditioning protocols in this guide and generator adhere to evidence-based recommendations from the American College of Sports Medicine (ACSM), peer-reviewed load-carriage studies from the National Strength and Conditioning Association (NSCA), and backcountry orthopedic recommendations from the Wilderness Medical Society (WMS).
- Field Experience & Empirical Testing: Designed and validated by mountain navigation specialist Oliver Fall across varied alpine terrain, steep scree approaches, and sustained 3,000+ vertical foot ascents in the American Mountain West.
- Physical Fitness & Medical Clearance Notice: The schedules generated by this tool are general athletic conditioning guidelines for educational and personal planning purposes. They do not constitute personalized medical advice, diagnosis, or clinical physical therapy prescriptions. Always consult a physician or licensed physical therapist before initiating high-incline cardiovascular conditioning or loaded pack rucking, especially if you have a history of cardiovascular disease, knee osteoarthritis, lumbar disc issues, or respiratory conditions.