


If you wanted to know about breaking in hiking boots fast, the honest answer is 7 to 10 days of layered, progressive wear for most boots (if you prefer zero break-in time, compare trail runners vs hiking boots). Not a weekend trick, not one long walk the day before you leave. Nothing skips that timeline without raising your blister risk once you’re actually on trail. The boots that feel fine standing in the store are exactly the ones that fail six miles in if you skip this part.
What you can control is making those 7 to 10 days count instead of wasting them. Flat walks around the block don’t load the boot the way a trail does, so they don’t actually break anything in. Skipping that step is how a boot that felt broken in at home turns into a blister factory on trail.
Here’s what actually works: the five best methods for using those 7 to 10 days on purpose instead of hoping the boots sort themselves out. Start with the first one today if a trip is already on the calendar.
⚡ Quick Trail Takeaways
- Gradual Loading: Start by wearing new boots with hiking socks around the house for 2–3 days before progressing to short neighborhood walks.
- Conditioning Leather: Use specialized leather conditioner to soften stiff pressure points across the ankle collar and instep.
- Blister Prevention: Apply body glide or blister tape on common hot spots during the initial break-in period to prevent friction burns.
Table of Contents
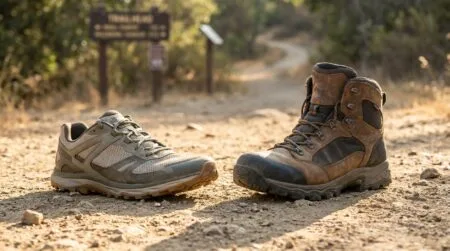
The boots that need the least time are trail-runner-style hiking shoes, which can be nearly ready to hike in out of the box. The boots that need the most are full-grain leather backpacking boots, which can take two to three weeks. Here’s the realistic range by boot type before you plan a trip around this:
| Boot Type | Typical Break-In Time | Where to Focus |
|---|---|---|
| Trail running shoes / low-cut hiking shoes | 1–3 short wears, often minimal | Sock system, quick fit check |
| Mid-cut synthetic or fabric hiking boots | 3–7 days of progressive wear | Indoor sessions + short walks |
| Leather/synthetic hybrid boots | 1–2 weeks | Indoor + short walks + conditioner on stiff spots |
| Full-grain leather backpacking boots | 2–3 weeks | All five methods, conditioner especially |

Why Boots Need Breaking In At All
A new boot’s midsole hasn’t flexed to your specific stride yet, and if there’s any leather in the upper, that leather hasn’t softened around the actual shape of your foot. Both of those things happen through repeated, moderate flexing, not through force. A stiff heel counter that hasn’t relaxed will rub the same spot on your Achilles every single step until it either softens or takes the skin off first.
That’s the whole mechanism, and it’s why rushing the process backfires. Wearing brand-new boots on a 10-mile hike doesn’t break them in faster. It just applies thousands of repetitions of the same friction before the boot has had any chance to soften, which is close to a guaranteed blister. The methods below work because they front-load the low-mileage flexing that actually softens a boot, before you ask it to carry you somewhere with no way to turn back early.
🥾 Oliver’s Trail Notes & Field Observations
When I tested heavy leather boots before tackling sections of the Pacific Crest Trail near Agua Dulce, my break-in protocol started indoors. I learned never to take new boots directly to a trailhead. Wearing them with dense merino wool socks around my desk and on daily neighborhood strolls for four days softened the stiff heel counters and molded the ankle collars before putting my feet under trail stress.
What Actually Causes a Hiking Boot Blister
Before diving into boot methods, understand that preventing friction is half the battle; see our guide on how to prevent blisters hiking.
A blister forms when repeated friction moves the layers of your skin against each other until a small pocket of fluid separates them, your body’s way of cushioning that specific spot from further damage. Heat and moisture speed this up, since damp skin generates more friction against fabric or leather than dry skin does, which is part of why a shakedown hike in wet socks can go worse than one in dry socks, even at the same distance.
None of the five methods below are arbitrary once you see it this way. The sock system reduces friction directly. Indoor sessions and short walks let the boot’s shape settle to your foot before you ask for real mileage, which reduces how much your skin and the boot’s interior are moving against each other in the first place. Stopping for a hot spot instead of pushing through catches the friction before it’s had enough repetitions to build a blister at all. Every method is aimed at one of those three levers: less friction, less movement, or less time spent on unresolved friction.
5 Methods to Break In Hiking Boots Fast
1. Start Indoors Before You Ever Step Outside
Wear the boots around the house, laced the way you’ll actually lace them on trail, for 30 to 60 minutes at a stretch, two or three times over your first couple of days. Wear the exact socks and insoles you plan to hike in, since sock thickness changes how the boot fits.
Why this works: indoor sessions let you catch a pressure point immediately and take the boots off the second something feels wrong, with zero cost. That’s the cheapest feedback you’ll ever get on a fit problem. REI’s How to Break in Your Hiking Boots guide backs up starting indoors before you take a new pair on trail.
What it looks like when you’re doing it right: you can point to specific spots that felt tight or rubbed, even if nothing hurt yet. Vague “they felt fine” isn’t information. A specific hot spot on the outside of your left heel is.
2. Add Real Miles in Short, Frequent Sessions
Move to actual walking: errands, a dog walk, a lap around the block, in the 1- to 3-mile range. Do this daily rather than saving it all for a single weekend session. Frequency matters more than any single walk’s length here.
Why this works: short, repeated sessions flex the sole and soften the upper the same way longer hikes would, without stacking hours of friction on a boot that hasn’t adjusted yet. You’re getting the same total break-in mileage with a fraction of the blister risk.
What it looks like when you’re doing it right: each walk feels slightly better than the last one in the same spots. If a spot is getting worse, not better, after three or four sessions, that’s a signal to jump to the mistakes section below, not push through.

3. Wear the Exact Sock System You’ll Hike In
Pick your hiking sock setup now, not the week of the trip, and wear that exact combination for every single break-in session. A thin liner sock under a thicker merino wool hiking sock is a common setup specifically because it reduces friction between your foot and the sock, rather than between your foot and the boot.
Why this works: boot fit isn’t just about the boot. It’s about the boot plus whatever’s inside it, and a sock swap can change a well-fitted boot into a tight one or a loose one. Breaking in boots with the wrong socks means breaking them in for a fit you won’t actually be hiking in.
What it looks like when you’re doing it right: no bunching, no seams sitting under your toes, and the same sock system every time you put the boots on, including on trip day.
4. Target Stiff Spots With Conditioner, Not Heat or Water
For leather or leather-hybrid boots, a leather conditioner applied to specifically stiff areas, the heel counter, the tongue, the crease at the ball of the foot, softens that leather faster than wear alone. Work it in sparingly. Too much can change the fit you were trying to preserve.
What not to do: don’t soak boots in water and don’t blast them with high heat from an oven or a hair dryer to “speed up” softening. Both are old advice that can warp soles, break down adhesives, and damage a waterproof membrane if the boot has one. If your boots are Gore-Tex-lined or otherwise waterproof, skip aggressive heat and stick to conditioner on the exterior leather only.
Why this works: conditioner softens leather fibers directly, which is faster than waiting for months of wear to do the same thing, without the structural damage water or heat can cause.
What it looks like when you’re doing it right: the treated areas flex noticeably more by hand after a day or two, and the boot’s waterproofing and stitching show no visible change.
5. Run a Shakedown Hike Before the Real One
Before the actual trip, do one dedicated hike, 2 to 4 miles, with the pack weight and terrain you’ll actually be carrying and walking on, not just neighborhood pavement. Treat it as a test, not the trip itself.
Why this works: pavement and trail load your feet differently, and a boot that feels perfect on flat sidewalks can reveal a new pressure point on an incline or loose gravel. A shakedown hike surfaces that problem while you can still exchange the boots or add a lacing fix, not on day one of a trip you can’t back out of.
What it looks like when you’re doing it right: you finish the shakedown hike with dry socks and no new hot spots. If you don’t, you’ve found the problem early, which is the entire point of doing this hike at all.
💡 Trail Tip: Keep a small blister kit, moleskin or athletic tape, in your pack starting on day one of break-in, not just for the real trip. Most of what you’ll use it for happens during these short practice walks, not the hike you’re actually training for.
🥾 Heel-Lock Lacing Field Note
During my field trials on the steep stone stairs above Chantry Flat, I found that hot spots on beginner heels usually stem from loose lacing rather than improper boot sizing. In my experience, using a surgeon’s knot—a double twist at the ankle eyelet—locks heel movement into the rear cup and stops forward foot slippage on descents without cutting off instep blood circulation.
Common Mistakes That Slow Down (or Wreck) a Break-In
Soaking hiking boots in water to soften them faster. This is genuinely old advice that still circulates, and it’s a bad trade: water can warp soles and weaken the adhesives holding the boot together, and it does nothing a few days of normal wear do better and more safely.
Jumping straight to a long hike on day one. This is the single most common mistake for anyone specifically trying to break boots in fast, since skipping to the finish line feels efficient. It’s the opposite. A long first hike in unbroken boots front-loads the exact friction the methods above are designed to spread out.
Ignoring a hot spot instead of stopping for it. A hot spot is a warning, not a minor annoyance to push through. I’ve pushed through one on a short local trail because I didn’t want to stop and dig out moleskin, and it cost me a blister that was still healing a week later. Stopping for 90 seconds to tape it would have ended the story right there.
Treating every boot like it needs the same break-in. Flexible trail-running-style hiking shoes need very little break-in time, and giving them two weeks of cautious short walks wastes time you didn’t need to spend. Stiff leather backpacking boots need the opposite: rushing them because “boots are boots” is how the worst blisters happen.
When the Problem Isn’t Break-In Anymore
Most boot discomfort resolves within the timeline in the table above. A few signs mean you’re dealing with something break-in alone won’t fix.
If sharp, specific pain in the same spot hasn’t improved at all after 7 to 10 days of consistent wear, that’s usually a fit problem, not a break-in problem. No amount of extra wear turns a hiking boot that’s the wrong size or shape for your foot into a comfortable one.

Two patterns are worth telling apart. Persistent heel lift usually means the boot is too big or needs a different lacing pattern. A tight, unchanging pressure point across the top of your foot or toe box usually means the boot is too narrow, not under-broken-in. At that point, a return, exchange, or a visit to a footwear specialist for a different size or width is the actual fix.
Watch any blister for infection rather than just discomfort: spreading redness, pus, or red streaks tracking away from the site are signs to get it looked at rather than self-treat, according to NOLS wilderness medicine guidance. That’s uncommon, but it’s worth knowing the difference between “this hurts” and “this needs a professional.” See How to Prevent and Treat Blisters for the full breakdown.
How fast can you actually break in hiking boots?
Realistically, 7 to 10 days of progressive wear for most mid-weight boots, using short indoor sessions followed by short real walks, done daily rather than all at once. Full-grain leather backpacking boots can take 2 to 3 weeks, while flexible trail-running-style hiking shoes may need almost no dedicated break-in time at all. There isn’t a genuine shortcut past that range that doesn’t raise your blister risk.
How do you break in new hiking boots without getting blisters?
Start with short indoor wear in the exact socks you’ll hike in, move to short real walks in the 1- to 3-mile range, and stop the moment you feel a hot spot rather than pushing through it. A fully no-blister boot break-in isn’t something any guide can honestly promise, since individual foot shape and boot fit both play a role, but this sequence is what actually lowers the odds the most.
How long does it take to break in leather vs. synthetic hiking boots?
Full-grain leather boots typically take 2 to 3 weeks of progressive wear, since the leather itself needs time to soften around your foot. Synthetic or fabric-mesh hiking boots usually need 3 to 7 days, and low-cut trail-running-style hiking shoes often need almost none. If you’re not sure which category your boots fall into, check the upper material on the product listing or the boot’s tongue label.
How do you soften stiff hiking boots faster?
A leather conditioner applied to specifically stiff spots, the heel counter, the tongue, and the ball-of-foot crease, softens leather faster than wear alone. Skip water-soaking and high heat, both of which can damage adhesives, soles, and any waterproof membrane the boot has. For synthetic boots, conditioner won’t help much since there’s no leather to soften; short, frequent wear is the actual fix.
Do you need to stretch hiking boots, or is wearing them in enough?
For most boots, progressive wear is enough on its own. A boot stretcher, the two-way tool that widens a specific area, is worth using only for one persistent tight spot, like a narrow toe box, after normal break-in hasn’t resolved it. Stretching an entire boot to fix a fundamental sizing problem usually doesn’t work as well as just getting a properly fitted size.
What’s the fastest way to break in walking boots before a trip this weekend?
If you’re calling it “wearing in walking boots” or “breaking in hiking boots,” the process and the honest timeline are the same either way, and a single weekend isn’t enough time for most boots without meaningfully raising blister risk. If the trip can’t move, prioritize methods 1 through 3 daily between now and departure, pack a blister kit, and consider a lower-mileage or flatter route for this specific trip so a fit problem doesn’t turn into a trip-ending one.
The Honest Timeline Beats the Fast Trick
There’s no method that turns a two-week leather boot break-in into a two-day process without gambling on blisters (if you are shopping for affordable pairs that break in easily, check out the 7 best hiking boots under $100). What actually gets you to comfortable, broken-in hiking boots as fast is realistically possible is layering the five methods above, daily, starting the moment the boots arrive rather than the weekend before a trip.
Start indoors, add short real miles, keep your sock system consistent, treat stiff leather spots directly, and finish with a shakedown hike before the real one. That sequence won’t shortcut the biology of a boot softening to your foot, but it’s the fastest honest path through it.
Next Steps
- Today: Put the hiking boots on inside the house in the exact socks you’ll hike in, and wear them for 30 to 60 minutes.
- This week: Add a short real walk daily, 1 to 3 miles, checking for hot spots after each one.
- Before a real trip: Run a shakedown hike with your actual pack weight and terrain, not just pavement.