

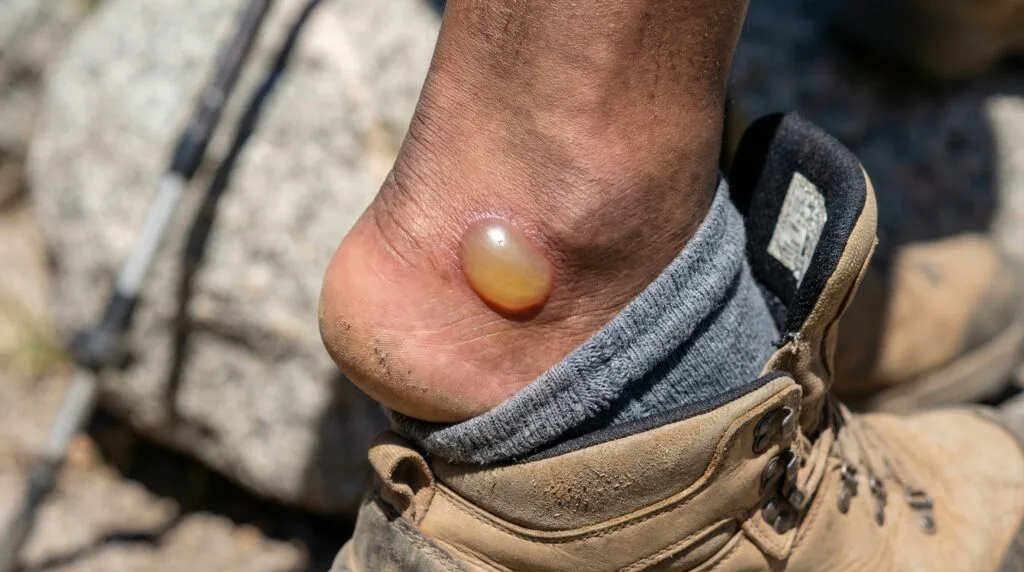
Few things ruin the excitement of hiking faster than discovering a painful nickel-sized blister on the back of your heel right as you take your boots off in the parking lot. The good news is that trail blisters are almost entirely preventable once you understand the two forces that cause them: friction and moisture. By mastering proper footwear fit, choosing merino wool socks, and pre-taping known hotspots, you can protect your feet on every outing.
⚡ Quick Trail Takeaways
- Pre-Taping: Apply Leukotape P to heels and toes before setting foot on trail.
- Sock System: Wear merino wool or double-layer synthetic socks; avoid cotton entirely.
- Toe Box Clearance: Footwear needs 1/2 inch of space in front of toes to prevent downhill jamming.
Hiking blister prevention is not complicated. It comes down to friction and moisture, both of which you can control before and during a hike. The eight fixes in this article address every point in that chain: boot fit, sock choice, taping, lacing, moisture management, hot spot response, break-in, and pre-hike preparation. Apply two or three of them consistently and blisters stop being a recurring cost of going outside.
I got a blister at mile 3.1 of a 6-mile trail in the San Gabriel Mountains. New boots, two weeks old, had felt fine in the parking lot. By mile 3, the left heel was a hot spot. By mile 4.5, the skin had separated. I finished the hike, which I should not have done, and the blister got infected enough to cancel the following weekend’s hike. That was a $0 lesson that could have been prevented by two things from this list, both of which cost less than $8 combined.
This guide covers what actually causes hiking blisters, 8 specific prevention fixes ordered by impact, how to stop blisters when hiking if one starts forming anyway, and the specific thresholds for when a blister becomes a reason to end the hike early.
🟠 Before You Head Out:
This guide covers blister prevention and early on-trail response. An infected blister
requires medical attention, not trail first aid. If a blister is showing redness spreading
beyond the blister edge, warmth, or pus: do not drain it on trail. See a doctor.Read on for everything you need to prevent this situation entirely.
| Blister Defense Method | Primary Benefit | Application Timing | Effectiveness |
|---|---|---|---|
| Leukotape P Pre-Taping | Prevents skin friction shear | Before leaving home | High (Gold Standard) |
| Merino Wool / Double Sock | Moisture management & cushion | During all hikes | High |
| Anti-Friction Glide Balm | Reduces friction on skin contact | Pre-hike & mid-hike | Moderate |
🥾 Oliver’s Trail Notes & Field Observations
After nursing dime-sized friction blisters on my heels during an early 16-mile push up Mt. Baden-Powell, I stopped carrying blister treatment and started practicing prevention. In my pack today, you will always find a roll of Leukotape P wrapped around my trekking pole. In my experience across 8 years of trail testing, applying strips directly over known hot spots—before putting socks on—completely eliminates shearing forces because the tape takes the friction instead of your epidermis.
How to Prevent Blisters Hiking: What Actually Causes Them
Why hiking blisters form faster than most people expect
A blister forms when friction separates the outer layer of skin from the layer beneath it. Fluid fills the gap. The blister you see is that fluid, which is your body protecting the damaged tissue underneath.
Two conditions produce friction fast on trail: movement inside the boot and moisture softening the skin. Most beginners think about one of these. Preventing hiking blisters requires controlling both simultaneously.
Movement inside the boot happens when the boot fits slightly wrong: too wide at the heel, too loose at the midfoot, or when laces loosen on a long descent and the foot slides forward. Even a few millimeters of repetitive movement will produce a hot spot within 2 miles on most foot types. The blister does not feel like it is building. Then it is there.
Moisture softens skin and dramatically lowers the friction threshold required to cause damage. Sweating feet, creek crossings, morning dew on grass sections, and rain all wet the skin. Wet skin blisters at a fraction of the friction level that dry skin tolerates. A boot that would have been fine for 8 miles on a dry day can produce a blister by mile 3 when feet are wet.
The three conditions that create hiking blisters every time
Heat, moisture, and repetitive friction occurring together are the reliable blister formula. Remove any one of them and the risk drops significantly. Remove two and hiking blister prevention becomes almost automatic.
The American Hiking Society identifies footwear fit and moisture management as the two most controllable blister risk factors for day hikers. Both are addressed before the trailhead, not on trail. If you arrive at the trailhead with correctly fitted boots, moisture-wicking socks, and foot care for hiking already applied, you have already handled the majority of your blister risk before you take a step.
Hiking Blister Prevention: 8 Fixes That Work
Fix 1: Fit your boots correctly before the first mile
How boot fit causes most hiking blisters
Boot fit is where hiking blister prevention starts. Not sock choice. Not taping. Fit. A boot that fits correctly moves with your foot. A boot that fits incorrectly allows your foot to move inside the boot, and that difference is the primary mechanical cause of blisters.
Get your feet measured at a running or outdoor specialty store before buying trail footwear. Not the size you wore in dress shoes five years ago. Your actual current size, measured at the end of the day when feet are at their largest. Hiking boots should have a full thumb’s width of space between your longest toe and the boot end. The heel should seat firmly with minimal lift when you walk on a slight incline.
Try boots on in the store with the socks you plan to hike in. Walk on the inclined ramp most outdoor stores provide. If your heel lifts on the incline, the boot does not fit correctly regardless of the size. A heel that lifts 6 inches into a hike produces a blister at the contact point on the back of the heel. This is the most common location for hiking blisters, and it is almost entirely a fit problem.
Fix 2: Use hiking sock liners
How hiking sock liners reduce friction
My honest opinion on hiking sock liners: they are the most underused blister prevention tool for beginners, and most trail content barely mentions them. A liner sock worn under your main hiking sock eliminates the friction point between foot and sock entirely. The two sock layers slide against each other, not against your foot.
Hiking sock liners are thin, moisture-wicking inner socks that cost $8 to $16 per pair. Brands like Darn Tough and Injinji make models specifically designed for this purpose. The liner fits snug to the foot. The outer hiking sock goes over it. Any friction that would have hit your foot now hits the interface between the two sock layers instead.
The additional benefit: sock liners actively move sweat away from the foot surface faster than a single hiking sock does, keeping the skin drier and further above the blister threshold. For any hike over 5 miles or in warm weather above 70°F, hiking sock liners are worth putting on before you get dressed, not as an afterthought.
Fix 3: Apply blister tape for hiking before you feel friction
Where and how to apply blister tape correctly
Blister tape for hiking works best when applied before you feel anything, not after a hot spot has formed. Once you feel friction, inflammation has already started. Tape applied over an active hot spot reduces additional damage but does not undo the process already in motion.
The two tape options that actually work on trail: Leukotape P and Body Glide. They are different tools for different applications.
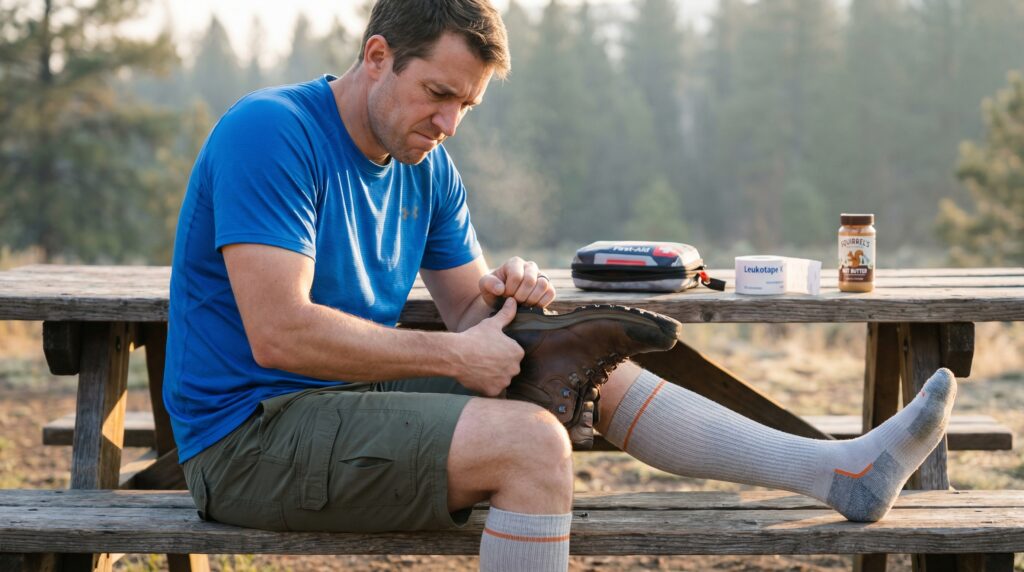
Leukotape P is an aggressive medical adhesive tape that stays in place through sweat, creek crossings, and descents that would remove standard bandages. Apply it to the heel, the sides of the toes, and any area that has produced a blister on a previous hike. Tear into strips, round the corners so edges do not peel, and apply directly to clean dry skin before putting on socks. A roll costs about $8 at most pharmacies and lasts for many hikes.
Body Glide is a friction-reducing balm applied like a stick deodorant. Useful for toes, between toes, and the ball of the foot. It reduces friction directly rather than covering the skin. Apply before socks go on. Reapplication mid-hike is not realistic, so the initial application at home is the one that matters.
Fix 4: Lace your boots for your foot type
The lacing adjustment most beginners skip
Standard boot lacing is a starting point, not the finished product. Most lacing methods leave two problems unaddressed: heel lift on descents and toe pressure from laces that are too tight across the top of the foot.
Heel lock lacing solves heel lift. Take the last two lace loops before the top eyelets and cross them over to the opposite side before continuing to the top, creating a locked ankle section. The heel stays seated during the descent rather than lifting and rubbing. REI’s guide to boot lacing techniques covers the specific pattern with diagrams.
On long descents specifically: stop and retighten laces at the trailhead before descent begins. Laces loosen over the course of a climb as the boot flexes. Loose laces on descent mean more foot movement, which means more friction at the heel and toe box. This one adjustment prevents the blister type most people get on the way back down.
Fix 5: Manage moisture actively
Keeping feet dry enough to matter
Cotton socks cause blisters. This is the single categorical footwear statement in this article and it stands without qualification. Cotton holds moisture against the skin. Wet cotton against a foot that is walking for 4 miles produces blisters reliably. Switch to merino wool or synthetic merino wool hiking socks before any trail that lasts more than 30 minutes.
For creek crossings or wet trail sections: gaiters over low-cut boots or trail runners keep water and debris out of the boot collar in most conditions. If you cross a creek and cannot dry your feet before continuing, loosen the boot, remove the sock, wring it as dry as possible, and take 5 minutes in sun if available before continuing. A wet sock on a wet foot for the next 3 miles will produce blisters on feet that would have been fine all day dry.
Foot powder or cornstarch applied inside the sock reduces moisture buildup during the hike. Gold Bond foot powder costs $6 at most pharmacies and extends the dryness window significantly on warm-weather hikes.
Fix 6: Stop at the first hot spot signal
What a hot spot tells you and how long you have
A hot spot is a warm, slightly tender area on the foot that appears before any visible damage. Most hikers notice it and keep walking. Every minute you keep walking on a hot spot is time the friction is still occurring.
Stop when you feel a hot spot. Sit down. Remove the boot and sock. Look at the area. If the skin is red but unbroken, you have caught it early enough that blister tape for hiking applied now will prevent the blister from forming. Clean the area if possible, apply Leukotape P, smooth out wrinkles, put the sock back on over it, and continue.
If the skin has already raised into a blister, do not pop it on trail. The blister roof is protecting the damaged tissue beneath it. Popping it removes that protection and introduces infection risk to a wound that is actively being friction-loaded with every step. Cover it with Leukotape P and moleskin cut to fit, and end the hike at the earliest reasonable point.
Fix 7: Break in footwear before any trail over 3 miles
A break-in schedule that actually prevents the problem
I skipped boot break-in on my first two pairs of hiking boots. I told myself they felt fine in the store and the break-in advice was overblown. Both times I got blisters within the first 4 miles. The honest admission: I was wrong about this, and the break-in schedule below is what I now follow with any new footwear.
Week 1: Wear the boots around the house for 2 to 3 hours per day. Not outdoor walking. Inside, where you can take them off immediately if something feels wrong.
Week 2: Two walks of 1 to 2 miles on pavement or flat terrain. This is where you identify any pressure points before a trail exposes them.
Week 3: One trail walk of 2 to 3 miles. Bring your full blister prevention kit. Pay attention to any hot spot emergence and note exactly where it is.
Week 4 and beyond: Boots are ready for hikes of their intended length.
This schedule feels slow. It is fast compared to the 3-week recovery from an infected blister.
Fix 8: Foot care for hiking starts before you leave home
The pre-hike preparation most people do not do
Cracked heels and thick calluses that form ridges create friction points inside a boot that taping does not fully address. Regular foot care for hiking between trails removes the structural causes of blisters that no amount of taping compensates for.
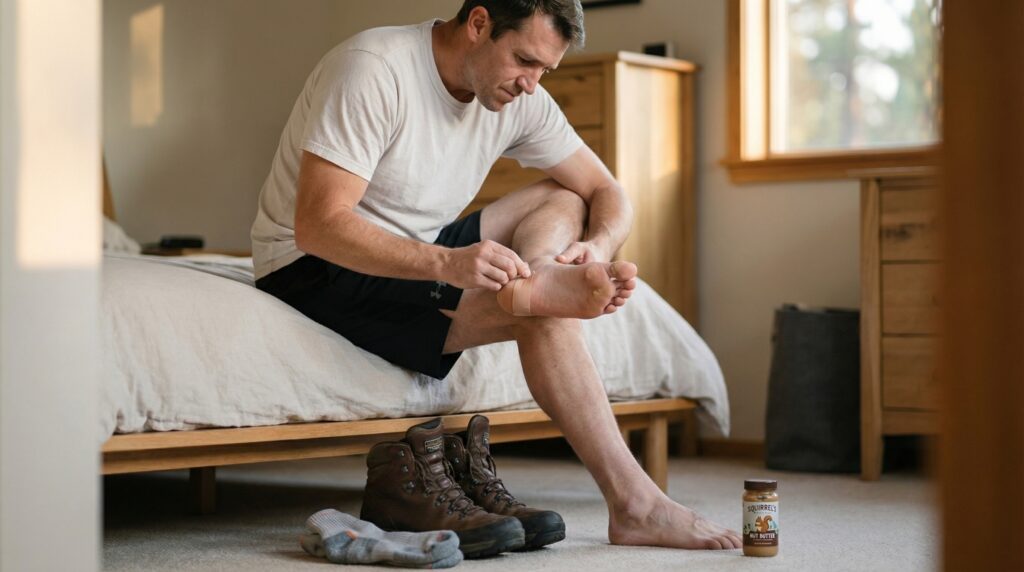
File calluses to an even surface rather than removing them. Calluses protect the foot. The goal is smooth calluses, not no calluses. Cracked heel skin can be treated with a urea-based moisturizing cream applied every night for two to three weeks before a hiking trip. Thirty minutes before the hike: trim toenails straight across (not rounded) so the nail edge does not press into adjacent toes on downhill sections.
🥾 Sock Layering in Desert & Mountain Heat
During summer testing in the dry heat of the San Gabriel foothills, sweat-soaked cotton or thick wool socks produced hot spots within the first 4 miles. I switched to an Injinji synthetic toe-sock liner beneath a medium-cushion Darn Tough merino wool sock. Separating the toes stopped skin-on-skin friction entirely, and pulling my shoes off for 5 minutes during mid-hike lunch breaks to let the liners air dry has kept me blister-free for thousands of miles.
How to Stop Blisters When Hiking: On-Trail Treatment
What to do when a blister forms despite prevention
How to stop blisters when hiking once one has started: the answer depends on whether the blister roof is intact.
Intact blister: cover it with Leukotape P, layer moleskin cut into a donut shape around the blister (not over it), and secure the edges. The donut shape raises the material around the blister and reduces direct contact with the boot. This is the setup that gets most people to the trailhead. It is not a long-term treatment. Get off trail at the earliest point and let the blister resolve naturally over 3 to 5 days with clean bandaging.
Blister that has opened on its own: the skin is no longer protecting the tissue beneath. Clean the area with an antiseptic wipe, let it dry completely, cover with a non-stick dressing and Leukotape P over the top. Reduce pace. End the hike. An open blister that continues to be loaded with walking has a realistic infection timeline of 24 to 36 hours if not kept clean and covered properly.
Common Foot Care Mistakes That Cause Blisters Every Time
Four patterns beginners repeat on every hike
Buying boots online without trying them on. Boot sizing is not consistent across brands, and the width variation between models is significant enough that the same size in two different boots can produce completely different fit outcomes. How to prevent blisters hiking starts at the store, not at checkout. Try them on. Walk on the incline ramp. If no outdoor store is accessible, order from retailers with free returns and try them on pavement for 30 minutes before wearing on trail.
Treating sock choice as an afterthought. Socks matter more than most beginners expect relative to how cheap the fix is. Checking our tested guide to the best hiking socks for beginners breaks down why merino wool and dual-layer socks stop blisters before they start. A $20 pair of Darn Tough wool hiking socks with a hiking sock liner costs less than one trip to urgent care for an infected blister. The math is not close. Foot care for hiking at its most cost-effective is buying the right socks before the first hike.
Using blister tape for hiking only after a blister forms. Moleskin applied over a fully formed blister protects it from additional friction. It does not treat the blister. Leukotape P applied to a known friction point before the hike prevents the blister from forming. These are different tools for different stages of the problem. The prevention stage requires applying tape to clean dry skin before you put socks on, at home, not at the trailhead.
Ignoring fit problems because boots felt fine for the first mile. Boots feel fine for the first mile of almost every hike. The friction is cumulative. By mile 3, the small amount of heel lift that was barely noticeable at the trailhead has produced enough repetitive friction to begin separating skin layers. If a boot has ever produced a blister on a previous hike, it will produce a blister again unless the fit problem is corrected.
When to Change Your Plan
Specific thresholds for blister severity on trail
Blisters range from minor friction irritation to situations that require medical attention. These thresholds are specific so you do not have to interpret in the moment.
Turn Around Now
- A blister has opened and the raw tissue is exposed, and you have more than 1.5 miles to the trailhead
- Any blister shows redness spreading beyond the blister edge, warmth to the touch, or fluid that is cloudy or discolored rather than clear
- Pain from the blister is altering your gait, causing you to weight the opposite side of the foot or the other leg
- You do not have tape, moleskin, or any blister treatment in your pack and the blister has opened
Slow Down and Reassess
- A hot spot has emerged and you have tape available to apply immediately
- A blister has formed but the roof is intact, you have treatment supplies, and the trailhead is under 2 miles away
- One blister is manageable with supplies on hand; a second blister emerging on a different foot location signals a systemic fit problem that further hiking will worsen
You’re Fine: Keep Going
- You applied tape to a hot spot within 10 minutes of feeling it and it has not progressed to a blister after 20 minutes of hiking
- A small intact blister is covered, not causing gait changes, and you have under 1 mile to the trailhead
One rule: When unsure which tier applies, treat it as the higher one. An infected blister costs a week of recovery minimum and sometimes a course of antibiotics. No trail view is worth that math.
How to prevent blisters hiking if I already have sensitive feet?
The fix for sensitive feet is layering prevention: hiking sock liners under wool socks, Leukotape P applied to every area that has ever blistered before, and boot fit verified by an outdoor store professional rather than online sizing. Hiking blister prevention for sensitive feet is not harder than for normal feet. It is more specific. Know exactly where your foot produces blisters and address those locations before every hike rather than only after the last one.
What is the best blister tape for hiking?
Leukotape P is the most effective blister tape for hiking available without a prescription. It bonds to skin through sweat, stays intact through creek crossings, and does not roll or peel at the edges when applied correctly. The only common complaint: it removes some skin when taken off. Rounding the corners of each piece reduces this significantly. Body Glide is the correct product for areas where tape application is not practical, like between toes.
Do hiking sock liners actually make a difference?
Yes, consistently. Hiking sock liners move friction from the skin-to-sock interface to the liner-to-sock interface. The liner slides, not the skin. The secondary benefit is moisture management: a liner-and-sock combination keeps the foot surface drier than a single sock of any material because the two layers together wick moisture away from the skin more aggressively. For any hike over 5 miles or any warm-weather hike, hiking sock liners produce a measurable difference in whether blisters form.
What is the best foot care for hiking to do the night before?
Apply a urea-based moisturizing cream to dry or cracked heel areas. Trim toenails straight across. Check that your hiking socks are clean and dry (worn socks lose some loft that affects moisture management). Load your pack with Leukotape P, moleskin, Body Glide, and antiseptic wipes in a small kit accessible without removing the pack. Foot care for hiking done the night before prevents the rushed trailhead preparation that skips the steps that matter most.
How do I stop blisters from forming on long hikes specifically?
How to stop blisters when hiking longer distances requires one additional step beyond standard prevention: a planned mid-hike sock check. At the halfway point or around mile 4 to 5 of any hike over 8 miles, remove boots and socks, check for hot spots, let feet air for 5 minutes, and put on a fresh pair of socks if carrying them. A dry sock applied at the midpoint of a long hike resets the moisture situation and gives a new layer of friction protection for the second half. Most beginners do not carry a spare pair of socks. Most experienced hikers do.
Should I pop a hiking blister on trail?
No. Do not pop a blister on trail. The blister roof is protecting damaged tissue from the trail environment, which is not a sterile surface. Popping a blister removes that protection and creates an open wound that will be walked on for however many miles remain. The infection risk from an open blister loaded with trail bacteria is significantly higher than the discomfort of leaving it intact and reducing pace to the trailhead. Cover it, protect it, and let it resolve naturally at home under clean conditions over 3 to 5 days.
Hiking Blister Prevention Starts Before the Trailhead
How to prevent blisters hiking is almost entirely a preparation problem, not a trail problem. Correctly fitted boots, the right socks, tape applied at home, and laces adjusted for your foot type resolve the majority of hiking blister risk before you reach the trailhead.
The two fixes that produce the fastest change for most beginners: hiking sock liners and Leukotape P applied to known friction points before the hike. Together they cost under $25. The blister that cancels a weekend of hiking costs considerably more than that in time and frustration. Foot care for hiking done at home before the hike is the return on that investment.
Next Steps
- Right now: Check the toenails. Trim them straight across if they are rounded or overlong. That is the 30-second pre-hike foot care step most people skip until a toenail causes a blister on a descent.
- Before your next hike: Pick up Leukotape P and a pair of hiking sock liners. Both are available at most outdoor retailers and pharmacies. Apply the tape at home before putting socks on, not at the trailhead.
- Day of: Check your laces at the trailhead before the descent. Retighten them if any loosening occurred on the climb.
If you are starting out with brand new boots, make sure to follow our step-by-step methods for breaking in hiking boots fast to prevent deep blisters before your hike.
Frequently Asked Questions
Why do I always get blisters on my heels when hiking?
Heel blisters are usually caused by your heel lifting inside the boot, creating friction. A heel-lock lacing method can secure your foot and prevent this.
Should I pop a hiking blister?
It is generally advised not to pop a blister unless it is large and painful, as popping it opens the skin to infection.
Related Reads
Checked your closet for hiking boots and came up empty, just running shoes staring back at you? Here’s the straight-up truth about hitting the trail in running shoes instead of waiting until you can afford real gear.
Let a friend talk you into “just a few miles” without actually asking what that meant for your body? These 5 rules help you set your own number instead of going along with someone else’s idea of a few miles.
Mentally budgeted 45 minutes for a “short” 3-mile hike and ended up way off that mark? Here’s a much more accurate time estimate for that distance, the kind that actually accounts for breaks and terrain.
Did one hike a month ago and have been wondering ever since if that even counts as “getting into hiking”? Here’s a clear answer on how often beginners should actually get out there to build real momentum.
Finished your first hike feeling oddly different in ways you weren’t expecting at all? Here are 7 body changes first-timers tend to notice, some good, some surprising, all worth knowing beforehand.