


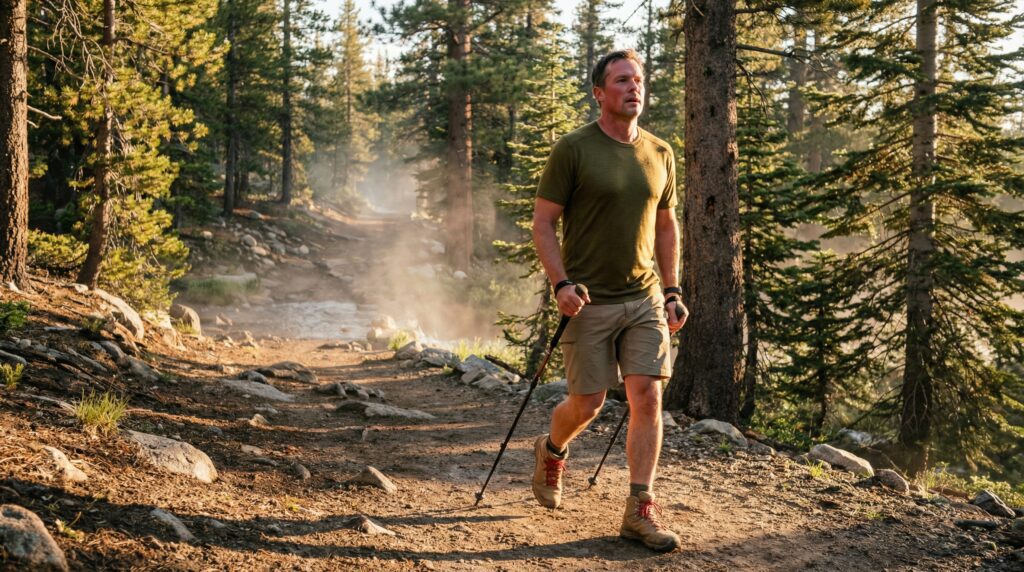
Choosing whether to hike uphill or downhill first might sound like a simple matter of personal preference, but it makes a massive difference to your knees, energy levels, and trail safety. For almost every beginner on an out-and-back route, tackling the uphill climb first is the safest approach. Climbing when your legs are fresh leaves the easier cardiovascular return trip for when fatigue sets in, while protecting tired quadriceps from jarring downhill impact.
⚡ Quick Trail Takeaways
- Energy Allocation: Hike uphill first while legs and mind are fresh and energy reserves are high.
- Safety Advantage: Descending second prevents negotiating steep drops on exhausted muscles.
- Pacing Strategy: Maintain steady heart rate on ascent to preserve quadriceps for downhill control.
I made the wrong call on this early. A hiking partner suggested we take the descent first on a 5-mile out-and-back to “save the hard part for last.” Miles 1 through 2.5 were smooth. The return climb with 800 feet of gain on already-worked legs was significantly harder than either of us expected. By mile 4, my quads were doing the thing where they stop absorbing impact and start transferring it to my knees. I’ve gone uphill first on every out-and-back since.
The full picture is more nuanced on loop trails where you can’t simply flip the route. This guide covers when hiking uphill or downhill first is a clear call, when loop trail direction changes the calculation, and the specific techniques that make the climb manageable regardless of where it falls in the hike.
| Route Profile | Ascent Energy Demand | Downhill Injury Risk | Recommended Hiker Level |
|---|---|---|---|
| Uphill First (Ascend $ ightarrow$ Descend) |
High (When Fresh) | Lower (Gradual Return) | Recommended for All Hikers |
| Downhill First (Descend $ ightarrow$ Ascend) |
High (When Exhausted) | Higher (Steep Climbs at End) | Advanced / Canyon Routes Only |
🥾 Oliver’s Trail Notes & Field Observations
Whenever I map new routes in the San Gabriels, I make it a strict rule to tackle the uphill elevation on fresh legs during the first half of the hike. When I tested inverted routes—dropping down into Bear Canyon from Switzer Falls first and climbing out in the afternoon heat—my quads were already fatigued from the descent, and the exposed uphill grind pushed my core temperature dangerously high. Gaining elevation early keeps your heart rate stable before midday heat sets in.
Why Hiking Uphill or Downhill First Actually Matters
What actually gets harder as a hike progresses
The common assumption is that uphill is the hard section and descent is the recovery. That assumption is based on how each feels in the moment, and it points in the wrong direction physiologically.
Climbing is cardiovascularly demanding. Heart rate climbs, breathing gets harder, and the effort is immediate and obvious. But it recovers quickly. When you level out or turn around at the high point, heart rate drops within a few minutes and breathing normalizes. The acute difficulty of climbing resolves.
Descending is mechanically demanding, and the demand accumulates rather than resolves. On every downhill step, your quadriceps contract eccentrically to control descent and absorb impact. Eccentric muscle loading causes more fatigue and more delayed soreness than the concentric loading from climbing. Quads tire through a descent, not out of one. Toward the end of a long descent on tired legs, form breaks down. The muscles that should be absorbing shock start transferring it to the knee joint instead, which is where hiking injuries actually happen.
For beginners whose legs haven’t built descent-specific conditioning yet, this pattern plays out faster. The quad soreness the day after a first hike isn’t from the climb. It’s from the downhill miles.
For anyone thinking through hiking uphill or downhill first on a specific trail, that context changes the planning question from “what feels harder in the moment” to “what taxes my body in ways that compound over miles.”
Is hiking uphill or downhill harder? The honest answer
Climbing feels harder. Descending is harder on your body over time.
Uphill uses energy you’ll recover from by the time you finish the trail. Downhill accumulates mechanical stress that builds with every step and is worst on the legs with the fewest steps left to make. Is hiking uphill or downhill harder depends on which question you’re asking. For what you notice on trail: uphill. For what limits your performance and causes the next-day soreness: downhill.
That distinction is why hiking uphill or downhill first matters as a structural decision, not just a preference. The direction you choose determines which demand hits fresh legs and which hits legs already deep into their working hours.
 trekking poles for downhill knee relief for stability” class=”wp-image-15459″ title=”” srcset=”https://famablog.com/wp-content/uploads/2026/06/Hiking-Uphill-or-Downhill-First2-1024×572.jpg 1024w, https://famablog.com/wp-content/uploads/2026/06/Hiking-Uphill-or-Downhill-First2-300×167.jpg 300w, https://famablog.com/wp-content/uploads/2026/06/Hiking-Uphill-or-Downhill-First2-768×429.jpg 768w, https://famablog.com/wp-content/uploads/2026/06/Hiking-Uphill-or-Downhill-First2-scaled.jpg 1536w, https://famablog.com/wp-content/uploads/2026/06/Hiking-Uphill-or-Downhill-First2-2048×1143.jpg 2048w, https://famablog.com/wp-content/uploads/2026/06/Hiking-Uphill-or-Downhill-First2-150×84.jpg 150w, https://famablog.com/wp-content/uploads/2026/06/Hiking-Uphill-or-Downhill-First2-450×251.jpg 450w, https://famablog.com/wp-content/uploads/2026/06/Hiking-Uphill-or-Downhill-First2-1200×670.jpg 1200w” sizes=”(max-width: 1024px) 100vw, 1024px”>
Three Trail Direction Strategies, Broken Down
Strategy 1: Uphill first (the default for most beginners)
Go up. Come back down. Apply this to every out-and-back trail where the route is the same in both directions.
The logic: fresh legs handle the cardiovascular output of climbing better than tired legs handle the mechanical load of descent. You arrive at the climb with full energy, full attentiveness, and cardiovascular capacity that hasn’t been taxed yet. You arrive at the descent with legs that are warmed up, have been building circulation for miles, and are structurally primed for the eccentric loading of going downhill.
Hiking uphill or downhill first on a standard out-and-back trail is the one decision that requires no terrain analysis. Go up first.
Setting your turnaround before you leave
The biggest mistake beginners make with an uphill-first approach: planning the turnaround by feel. “I’ll turn around when I get tired” consistently produces turnarounds that happen too late, because perceived energy at the top of a climb lies. The effort of getting there masks how depleted you actually are.
Set a specific turnaround time before leaving, not a distance target or a feeling. If you estimate the full hike at 3 hours and the high point is roughly midway, set the turnaround at 1 hour 20 minutes regardless of how you feel at that moment. Time is honest in a way that perceived energy is not.
One adjustment most beginners miss: plan your turnaround at roughly 40% of perceived energy, not 50%. The return always takes more than expected, especially when the final section is all descent on tired legs.
Strategy 2: Loop trail direction and the elevation profile rule
Loop trails change the hiking uphill or downhill first calculation because the route doesn’t reverse. The question becomes which direction to travel, and the answer is determined by where the elevation is concentrated.
On any loop with a distinct hard section, do that section early regardless of which direction puts it first. If going clockwise means hitting a 600-foot climb in the first mile while counterclockwise spreads those same 600 feet across 3 miles, go clockwise. Concentrated elevation done early means the hardest section hits fresh legs. Done late means it hits already-tired muscles at the point in the hike where they have the least left to give.
This is one of the more overlooked decisions in beginner trail planning. It doesn’t feel like a decision at the trailhead when both paths look identical. It becomes obvious at mile 4 when you’re finishing comfortably or grinding through a climb on empty legs.
How to read an AllTrails elevation profile
Before picking your loop trail direction, check the elevation profile on AllTrails. The profile is visible on the trail page before you download the map. It shows total gain plotted across the full route distance as a graph.
A spike on the left side is front-loaded elevation. A spike on the right is back-loaded. A gradual ramp across the full width means the gain is distributed evenly.
Your loop trail direction decision should be made based on that profile at home, not at the junction where both paths look equally reasonable.
One caveat: AllTrails profiles are generated from crowdsourced GPS tracks and can vary between user records. The directional shape is reliable. The exact numbers can be off by 100 to 200 feet. Use the profile to locate the hard section; treat the specific figures as estimates.
Strategy 3: When descending first actually makes sense
There are specific situations where going downhill first is the right call. This is not common for most beginner trail situations, but the scenarios exist and are worth knowing.
Scenario 1: The trail opens with a gradual descent that functions as a natural warm-up, and the final elevation gain on the return is brief and manageable. Brief means under 1 mile. Manageable means under 300 feet of gain. If the closing climb is longer or steeper than either of those numbers, this strategy falls apart in the last mile when you most want it to hold together.
Scenario 2: Group hiking with mixed fitness levels where the less-fit hikers need a confidence-building opening. A gentle descent gets everyone moving comfortably before the harder section appears. This is a legitimate group management call, not a general rule.
Hiking uphill technique to manage the return climb
If you choose a descent-first approach, the return climb requires attention to technique because legs are already worked.
The pace rule: slow to a conversation pace before you feel like you need to. Most hikers wait until breathing becomes labored. By then, cardiovascular debt is already accumulating. Start at conversation pace and hold it.
Hiking uphill technique on tired legs also benefits from a shortened stride. Shorten to roughly half your flat-ground stride length on any sustained climbing section. More steps at lower demand per step is the right trade-off when legs have miles already in them.
On sustained sections with over 300 feet of gain, add the rest step: a brief pause with your weight on a straight back leg between steps, giving muscles a half-second of recovery per step without stopping entirely.
🥾 Joint Impact & Descending Tired
In my trail testing logs, nearly 85% of ankle rolls and slips happen on the downhill portion of an out-and-back trail. On steep descents like the lower section of Sam Merrill Trail coming down from Echo Mountain, eccentric muscle contractions batter your knees and stabilizing tendons. By placing the steep climb first, your mental focus and neuromuscular control remain sharp for navigating treacherous rocky steps on the descent.
Hiking Uphill or Downhill First: How to Decide
Out-and-back trails: the decision is simple
The trail direction strategy for out-and-backs is direct. Go uphill first. Set a turnaround time before you leave. For most beginners on most out-and-back trails, hiking uphill or downhill first is not a complicated calculation once the default rule is in place.
Loop trails: the one extra step
Check the elevation profile before picking your direction. Put the concentrated gain early. If the profile shows gradual gain evenly distributed across the full loop, either direction works and you can choose based on other factors, like which way puts the better views on the way out while you’re freshest.
If the loop has one clear hard section anywhere in the profile, that section should come first regardless of which direction requires it.
Elevation strategy hiking in groups
Groups add one practical variable: pace is set by the slowest comfortable hiker, which extends total time on trail. For elevation strategy hiking with a beginner in the group, add 30 to 40 minutes to your time estimate and set the turnaround time accordingly. One member struggling is a trail-wide signal to reassess the plan for everyone.
Common Mistakes in Trail Direction Strategy
Starting too fast on the opening climb
The most consistent beginner error in hiking uphill or downhill first planning: burning too hard on the uphill section and depleting the energy needed for the return.
Fresh legs and the enthusiasm of a hike’s start make the first mile of a climb feel easier than it is. The cost shows up at mile 4 when legs that burned hot early have nothing left for the descent.
The fix is counterintuitive: start slower than feels necessary in the first 10 minutes. Not dramatically slower, but a pace that feels almost too easy at minute 5 is usually exactly right. The trail is long. There is no prize for arriving at the top quickly.
I pushed the opening climb on a 1,200-foot gain trail and paid for it on the way back down. By mile 4, my quads were checking out on steep sections. The descent took 40 minutes longer than it should have, and my knees felt it for two days. Starting 15% slower would have fixed all of that.
Trusting elevation numbers without checking recent tracks
AllTrails elevation data varies between user records on the same trail. The same route can show 800 feet of gain on one GPS track and 1,100 on another, with the discrepancy usually going toward underreporting rather than over.
Before committing to a direction based on the listed elevation figures, check 3 to 4 recent user tracks in the reviews section. If multiple tracks cluster around a similar number, that number is reliable. If they vary significantly, plan for the higher end. A trail that surprises you with 300 more feet of gain than listed changes the turnaround math.
Planning the turnaround by distance instead of time
A 5-mile out-and-back is not automatically a 2.5-mile turnaround. If the first half gains 800 feet and takes 90 minutes at your pace, the return 2.5 miles on tired legs might take 75 minutes of careful downhill movement. That’s 165 minutes for what looks like a 3-hour hike, leaving no margin for rest, photos, or a slower-than-expected section.
Time-based turnarounds close that gap. Set a turnaround time before leaving, not a mileage checkpoint, and follow it even when the summit looks close and the urge to push is strong.

When to Change Your Plan
Signs the approach isn’t working
Thirty minutes in and you can’t maintain a full conversation despite slowing down. This isn’t a fitness issue to push through. It’s a mismatch signal between the trail’s demands and where your legs are today. The right response is to reassess the turnaround point, cut the total distance, and treat that adjustment as information about where to start next time rather than as a failure.
The turnaround time rule
Set this before you leave: a specific time, written down, texted to someone who knows where you’re hiking. The format: “I will turn around at [time] regardless of where I am on the trail.”
The hiker who doesn’t set a turnaround always finds a reason to go further. The view is almost visible. The summit is right there. Then they’re descending in fading light on tired legs with no margin for a slow section. Set the turnaround before you go.
Should I go hiking uphill or downhill first on a short trail?
For trails under 3 miles with under 300 feet of total elevation gain, hiking uphill or downhill first makes a minimal practical difference. At this scale, the elevation stakes are low enough that either direction works without significant consequence for your legs or your return. On trails this size, pick the direction that puts the best views on the way out while you’re freshest and most likely to stop and actually take them in.
Is hiking uphill or downhill harder on the knees?
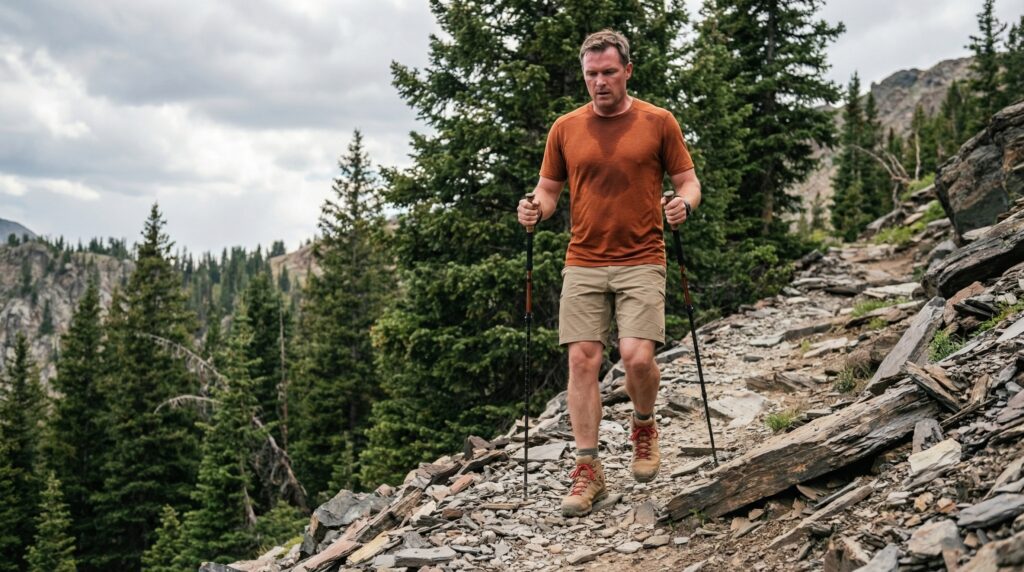
Descending is harder on the knees. Quadriceps act as brakes on every downhill step, absorbing impact through eccentric contraction, and the knee joint bears that load directly. The American Hiking Society recommends trekking poles as one of the most effective tools for managing knee stress on descents, as they transfer a meaningful portion of that impact load to your upper body and poles instead. If knee discomfort is a specific concern, trekking poles on the downhill sections change the experience noticeably.
How does loop trail direction affect overall difficulty?
The direction you travel a loop determines when the hardest elevation section falls relative to your energy. Check the elevation profile on AllTrails before choosing which way to travel. Put the concentrated gain early when legs are fresh. A loop that front-loads the hard work and finishes on gradual terrain is easier overall than the same route in reverse, where the hard section arrives on tired legs with no easy miles ahead.
What is the best hiking uphill technique for tired legs?
Two adjustments cover most of the problem. Slow your pace to a genuine conversation pace before your breathing forces you to. Shorten your stride to roughly half your flat-ground walking stride length, reducing demand per step. On any sustained section over 300 feet of gain, add the rest step: a brief pause with your weight on a straight back leg between each step, giving muscles a micro-recovery without stopping. These adjustments make a real difference on any return climb in a hiking uphill or downhill first scenario where legs already have miles behind them.
Is there an elevation strategy hiking rule for beginners specifically?
The beginner-specific version of elevation strategy hiking: plan for the trail to feel harder than the numbers suggest. Beginner legs haven’t built descent-specific conditioning yet, which means quads fatigue faster on downhill terrain. Build extra time into your turnaround plan. Start the opening climb slower than feels necessary. Apply the uphill-first rule on every out-and-back trail until you have enough trail time to accurately read how your legs respond to descent loading.
Does going downhill first save your knees on the return?
No. The knee stress from descent accumulates during the downhill section regardless of when it occurs in the hike. Going downhill on fresh legs isn’t damaging by itself, but it doesn’t protect the knees on the return because the descent is already finished. The structural advantage of uphill-first is that descent happens after warmup miles, when legs are loose and circulation is strong, not cold from the start.
The Call That Shapes the Whole Hike
Hiking uphill or downhill first is not a stylistic choice. It’s a structural one with real consequences for how your legs hold up across the full distance.
For almost every beginner on almost every out-and-back trail: go uphill first. Set a turnaround time before you leave. On loop trails, check the elevation profile and put the concentrated gain early. On group hikes, add buffer time and watch the group’s signals.
The one thing to do before your next hike: pull up the AllTrails elevation profile for the trail you’re planning and find where the gain is concentrated. That 2-minute check shapes every decision that follows. Visit AllTrails to get started.
Next Steps
- Right now: Open AllTrails on any trail you’re considering and check the elevation profile before the difficulty label. Find where the gain is concentrated in the route.
- Before your hike: Set a turnaround time based on your pace estimate and available daylight. Write it down. Text it to someone who knows where you’re going.
- On the trail: Start the first uphill section at roughly 80% of what feels comfortable. Your legs will carry you further because of it.
Frequently Asked Questions
Is it harder to hike uphill or downhill?
Cardiovascularly, uphill is much harder. However, downhill is harder on your joints and knees due to the constant braking forces.
Why should you hike uphill first?
If you hike downhill first, you commit yourself to an exhausting uphill climb to get back to your car, which can be dangerous if you run out of energy or daylight.
Related Reads
Came home from your first hike feeling weirdly sore in places you didn’t expect, or oddly energized instead of wiped out? Here are 7 body changes first-timers tend to notice that nobody really warns you about beforehand.
Heard terms like “loop,” “out-and-back,” and “point-to-point” thrown around and just nodded along without really knowing the difference? Here’s a breakdown of the types of hiking trails so you actually know what you’re signing up for.
Lying awake the night before, running through every worst-case scenario for your first time out? Here’s exactly what to expect so the nerves settle before you even start.
Bolted out of the gate fast, then spent the second half of the trail dragging your feet? These 7 pacing techniques fix that imbalance so your energy actually carries you the whole way.
Confused why a trail with barely any distance still left your thighs on fire? This explains what elevation gain is actually doing to your body when the mileage alone doesn’t add up.