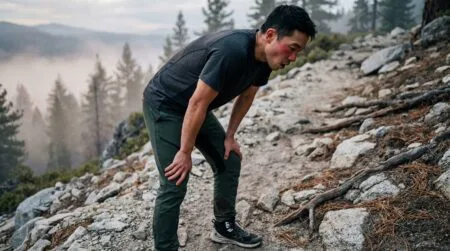


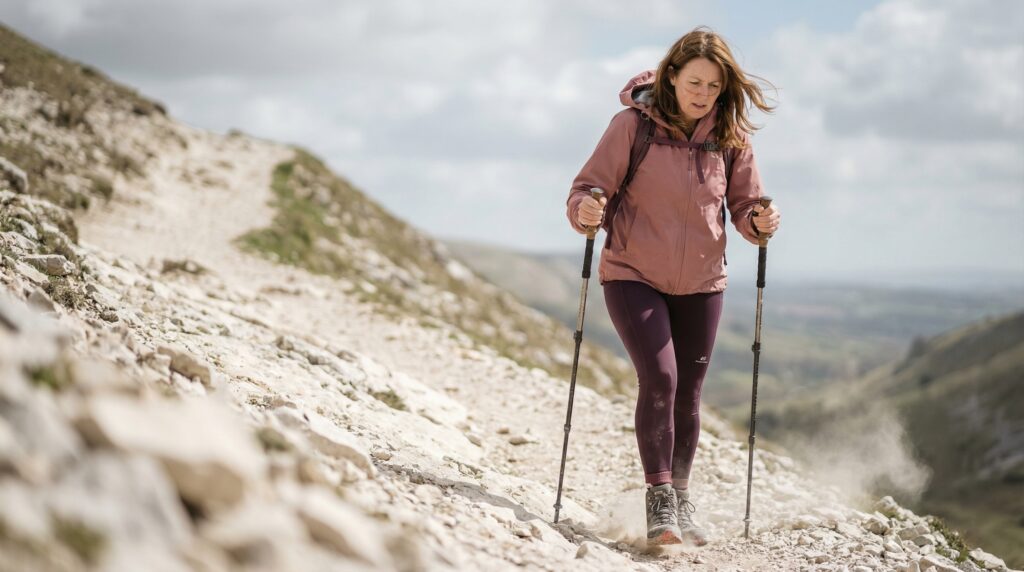
Knee pain hiking downhill is the most common complaint I hear from new hikers after their first real trail with any descent. Not sore quads. Not blisters. Their knees, specifically on the way back to the car. The trail that felt manageable going up turns into something that makes every step a negotiation.
⚡ Quick Trail Takeaways
- Trekking Poles: Offloads 15-25% of downhill knee joint impact forces to upper body muscles.
- Stride Mechanics: Shorten stride length and maintain slightly flexed knees to absorb impact.
- Targeted Support: Compression knee sleeves or PAT strap braces stabilize the patella on steep descents.
Here’s the honest answer: this is mostly a technique problem, not a fitness problem. Most knee pain hiking downhill comes from three correctable causes: how you place your feet, whether you’re using poles, and how fatigued your stabilizing muscles are before you start the descent. Fix the right one for your situation and the pain drops significantly.
I can’t promise every fix in this guide will work identically for everyone. What I can tell you is that shortening my stride on descents cut my own knee pain by more than half on the next trail I tested it on, a trail with 700 feet of drop that I had been dreading for months.
This guide covers why knee pain hiking downhill happens, six specific fixes ordered by how fast they work, how to select trails that reduce knee stress before you arrive, and the specific thresholds for when to stop and turn around.
🟠 Before You Head Out:
This guide covers prevention and trail management of knee pain on descent. If you experience sudden, sharp knee pain that was not building gradually, stop immediately. Call 911 or text 911 (available in most US counties). In areas without cell service, activate your emergency device, stay put if safe, and signal for help.
Read on for everything you need to prevent the common kind.
| Knee Relief Fix | Impact Offload | Equipment Needed | Ease of Implementation |
|---|---|---|---|
| Trekking Poles | High (20%+) | Pair of adjustable poles | Immediate on trail |
| Shortened Stride Mechanics | Moderate | None | Immediate body awareness |
| Patellar Knee Strap | Moderate | Neoprene Knee Strap ($15) | Instant joint support |
Why Knee Pain Hiking Downhill Happens
Why do my knees hurt walking downhill on trails
The short answer: your quad muscles are working as brakes on every step.
Walking uphill, your muscles shorten as they contract to push you up. Walking downhill, they lengthen under load to slow your descent. That is an eccentric contraction, and it is significantly harder on muscle tissue than the uphill version. Research from the Journal of Sports Sciences found that downhill hiking generates knee joint forces roughly three to four times body weight per step. On a trail with 600 feet of descent over 1.5 miles, you take roughly 1,500 to 2,000 steps down. That is a lot of repetitions of a high-load movement that most beginners have not trained for specifically.
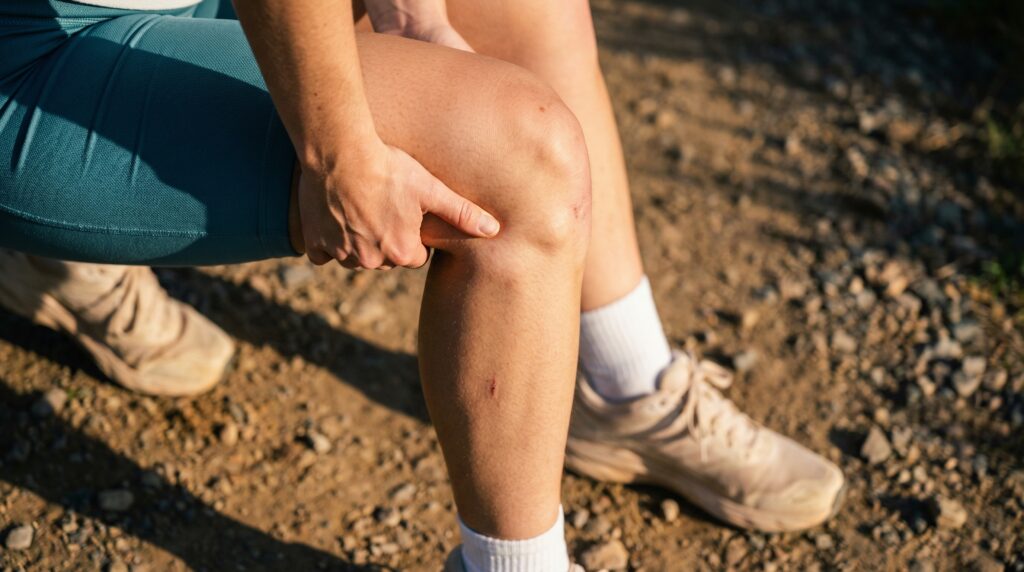
Knee pain hiking downhill most often shows up in one of two places: behind the kneecap (patellofemoral syndrome, sometimes called hiker’s knee) or along the outside of the knee (IT band friction). Both come from the same root cause. The stabilizing muscles around the knee cannot keep pace with the load. The kneecap tracks slightly off-center, tissue contacts where it should not, and you feel it on the descent.
The American Hiking Society notes that the majority of trail injuries involve preventable factors, with footwear and physical preparation leading the list. Knee injuries on descent fit exactly that pattern.
What makes descent harder than ascent for your knees
Two things consistently surprise first-time hikers who look into this.
Your cardiovascular system recovers faster than your muscles on descent. You stop panting around mile 2. You feel recovered. Meanwhile, your quads have been accumulating fatigue the whole way, just less visibly. The knee pain hiking downhill often hits suddenly at mile 3 of a 6-mile trail because the stabilizing muscles had been quietly failing for the last 30 minutes. The pain feels sudden. The cause had been building for a while.
The second thing: most beginners lean slightly back on steep descents because it feels more controlled. It is not. Leaning back shifts load to the heels, forces the quad to work harder as a brake, and loads the kneecap more directly than a neutral or slightly forward posture. This is a fixable technique error, and Fix 2 below addresses it directly.
Knee Pain Hiking Downhill: 6 Fixes That Work
Start with Fix 1 and Fix 2 on your next descent before adding the others. They produce the fastest noticeable change.
Fix 1: Use trekking poles for hiking pole knee support
How trekking poles reduce knee load on descent
A study from the Journal of Sports Sciences found that trekking poles reduce knee joint forces by 20 to 25 percent per step on descent. Over 1,500 steps down a long trail, that reduction adds up to something significant.
Hiking pole knee support works through load redistribution: your arms and poles share the braking force that would otherwise go entirely through your knees. The key is technique. Most beginners plant poles too far forward and use them like walking sticks. For proper hiking pole knee support, plant poles closer to your body, roughly even with your lead foot or slightly behind it, and press down through the grip at the moment your foot contacts the ground. That timing is what transfers load off the knee.
Pole height matters too. For descents, shorten poles 5 to 10 centimeters from your flat-ground setting. Your elbow should be at roughly 90 degrees when the tip touches the ground. REI’s guide to trekking pole technique covers the adjustment mechanics in detail.
I resisted trekking poles for my first two years of hiking because I thought they were for people who needed them. That was wrong. After one descent with poles on a trail with 800 feet of drop, I stopped caring how they looked entirely.
Fix 2: Shorten your stride
The stride length most beginners get wrong
This is the fix that surprised me most. Shortening your stride reduces knee load more than just slowing your speed.
When you take long strides going downhill, your lead foot lands far in front of your center of gravity. Your knee has to absorb the full braking force of that extended position, with the joint angled at a high-stress point. Shorter steps keep your foot underneath or close to your body. The knee bends less acutely at contact, and the load distributes more evenly through the whole leg.
Target: steps where your foot lands 18 to 24 inches in front of your body, not 30 to 36. It feels choppy for the first quarter mile. After that it feels normal, and the knees feel measurably better. Do not wait until your knees hurt to shorten your stride. Start at the top of the first descent.
Fix 3: Pick your foot placement deliberately
Choosing where your foot lands on uneven terrain
Most hikers step wherever the trail takes them. Hikers managing knee pain hiking downhill can reduce load by choosing landing spots deliberately.
Flat sections of rock and trail require less knee stabilization than angled or uneven landings. Soft soil on trail edges absorbs impact better than compacted center trail in many cases. Look one to two steps ahead, identify the flat landing spot, and adjust your stride length to hit it.
This sounds like a lot to track. It becomes automatic within 20 to 30 minutes on a descent. The habit matters most on rocky or technical sections, where landing angle varies significantly from step to step.
Fix 4: Strengthen the muscles that fail on descent
Three exercises that address the actual problem
Knee pain hiking downhill is often a quad and hip strength problem as much as a technique problem. The muscles that fail under load on descent are the VMO (the teardrop-shaped section of the inner quad, above the kneecap) and the hip abductors, which prevent your knee from caving inward on each step.
Three exercises address this directly:
Step-downs: Stand on a step or low box. Lower your opposite foot toward the floor slowly, 3 to 4 seconds, stopping before it touches the ground. Return to start. Three sets of 10 per leg, twice a week. This trains the exact eccentric quad movement of hiking downhill.
Wall sit: Back against the wall, feet shoulder-width apart, thighs parallel to the floor. Hold for 30 to 60 seconds. Three sets. Builds quad endurance without joint impact.
Clamshells: Lying on your side, knees bent, feet together. Open your top knee upward slowly, 15 to 20 repetitions per set, three sets per side. Builds hip abductor strength that prevents your knee from tracking inward under load.
Do these consistently for four to six weeks before a hiking day with significant descent. Knee pain hiking downhill usually improves noticeably within that window.
Fix 5: Knee braces for hiking
Which type actually helps with downhill pain
Knee braces for hiking fall into two categories: patellar tracking braces (also called patellar tendon straps or Cho-Pat straps) and compression sleeves. They address different problems.
For pain directly behind the kneecap, a patellar tendon strap is more useful than a sleeve. It wraps below the kneecap and applies pressure to the patellar tendon, slightly changing the tracking angle of the patella and reducing the friction that causes hiker’s knee. Most cost $15 to $30, weigh almost nothing, and many hikers report noticeable relief on the first descent.
For IT band pain on the outside of the knee, a compression sleeve worn across the joint helps more than a strap.
If you are unsure which one applies to your pain: buy the strap first. Patellofemoral issues are more common in beginners than IT band syndrome. Knee braces for hiking manage symptoms while the underlying technique and strength problems get addressed. They are not a substitute for Fixes 1 through 4.
Fix 6: Cut pack weight before the descent
How much pack weight matters on the way down
A loaded pack raises the forces your knees handle on descent proportionally. Research on load-carrying and joint stress shows that packs at 20 percent of body weight increase knee forces by roughly 10 to 12 percent per step on downhill terrain.
For a 160-pound hiker, a 32-pound pack adds measurable load on every step of the descent. Most beginner day hikers carry 15 to 25 pounds when 8 to 12 pounds would cover the same trail safely.
Go through your pack before a hike with significant descent. Remove the extra layer you brought as insurance but will not need given the forecast. Drop the second water bottle if one is genuinely enough for the distance. Each pound removed matters more going down than going up.
How to Protect Your Knees Hiking Before You Arrive
Protect knees hiking through trail selection
The most useful step you can take to protect knees hiking is not what you do on the trail. It is what you select before you arrive.
Descent rate matters more for knee pain than total elevation loss. A trail with 1,200 feet of descent concentrated in 1.5 miles stresses your knees far more than 1,200 feet spread across 4 miles. Check this on AllTrails by looking at the elevation profile, not just the total gain and loss numbers. A sharp, steep profile means concentrated descent. A gradual profile means lower-grade descent spread across more distance. For knee pain, gradual is better.
Read AllTrails reviews from the last 30 days before you go. Other hikers describe trail surface in their reviews, and a rocky, technical descent is harder on knees than smooth packed dirt. That information is in recent reviews, not the official trail description. AllTrails’ trail condition reviews are updated by hikers in real time, which makes them more reliable than static trail pages for current surface conditions.
Footwear also affects knee stress directly. Trail runners or hiking boots with stiff midsoles cushion impact on repeated downhill steps better than shoes with soft, compressive foam. A stiff midsole also stabilizes your foot on uneven landings, which reduces the micro-corrections your knee has to make on each step.
Common Mistakes That Make Hiking Knee Pain Worse
Four things beginners do that compound the problem
Waiting until it hurts to change technique. Knee pain hiking downhill builds gradually before it becomes acute. At minute 10 of a descent, your stride might be fine. At mile 3, fatigue has degraded it and the stabilizing muscles are behind. Implementing Fix 1 and Fix 2 at the top of every descent, before your knees hurt, prevents the accumulation that makes the pain feel sudden.
Leaning back on steep sections. It feels more controlled. It is not. Leaning back shifts load to the heels, increases quad activation as a brake, and loads the kneecap more directly than a neutral posture. If you consistently want to lean back on a given trail, that is often a signal the descent is steeper than your current skill and strength level, which is useful information about trail selection.
Stopping the technique fixes when pain stops. If poles and shortened stride resolved your knee pain hiking downhill, it is because those changes redistributed the load. Stop using them and the load comes back. The strengthening work in Fix 4 is what changes the situation permanently. The technique fixes get you through the descent while the strength is being built.
Pushing through sharp, sudden pain. Fatigue-type aching in the quad and around the knee after a long descent is normal. A sharp, sudden increase in pain that was not building, or pain that causes you to change your gait involuntarily, is not normal and is a reason to stop.
When to Change Your Plan
Specific thresholds for knee pain hiking downhill on trail
Knee pain hiking downhill ranges from manageable to serious. These thresholds are specific so you do not have to guess in the moment.
Turn Around Now
- Sharp, sudden onset of knee pain that was not building gradually over the descent
- Visible knee swelling that develops during the hike, not just after it
- You have changed your gait significantly to protect the knee (limping, locking the knee straight on each step)
- Pain is a 6 or above on a 10-point scale and does not respond to 5 minutes of rest in shade
- The knee buckles or gives out under your weight at any point
Slow Down and Reassess
- Aching pain that arrived around mile 2 to 3 and is sitting at a 3 to 4 out of 10
- You have implemented Fix 1 and Fix 2 and pain is stable but not improving
- You have more than 1 mile of descent still ahead of you
If you are in the Reassess tier: stop for 5 minutes, drink water, add the knee brace if you have one, shorten your stride further, and drop your pace by roughly 20 percent. If pain increases after that adjustment, move to Turn Around.

You’re Fine: Keep Going
- Mild fatigue-type discomfort in the quad, not in the knee joint specifically
- Pain is under a 3 and staying stable across the descent
- Stride and pole technique are keeping pain from building further
One rule: When unsure which tier applies, treat it as the higher one.
Why does knee pain hiking downhill hurt more than going uphill?
Downhill hiking loads your quads eccentrically, meaning the muscle lengthens while contracting to brake your descent. This is roughly 40 percent more demanding on muscle tissue than the concentric contraction of hiking uphill. Knee pain hiking downhill typically builds gradually over the length of the descent because fatigue accumulates in the stabilizing muscles, whereas uphill discomfort is more immediate and more linked to cardiovascular effort. Once you understand that pattern, the timing of the pain on your own hikes starts making sense.
What are the best knee braces for hiking with downhill pain?
For pain behind the kneecap, a patellar tendon strap (Cho-Pat style) is the most effective knee braces for hiking option for most beginners. It costs $15 to $30, weighs almost nothing, and provides patellar tracking support without restricting range of motion. For IT band pain on the outside of the knee, a compression sleeve fits over the joint and helps more than a strap. If you are unsure which applies to your pain, start with the strap. It addresses the more common beginner knee problem.
How does hiking pole knee support actually work on a descent?
Hiking pole knee support works by transferring a portion of your braking load from your legs to your arms and poles on each step down. The load reduction is roughly 20 to 25 percent per step, which compounds significantly over a long descent. Technique matters for this to work: plant poles close to your body, at a height where your elbow is at 90 degrees when the tip contacts the ground, and press down through the grip at the moment your foot lands. Poles planted far forward function more as balance aids than load-sharing tools.
How can I protect my knees hiking if I already have existing knee issues?
The most direct approach to protect knees hiking with existing issues: select trails with gradual descent profiles rather than steep, concentrated ones; use trekking poles from the very start of every descent rather than adding them after pain appears; and do the three strengthening exercises in Fix 4 consistently for at least four weeks before any hiking day with more than 400 feet of descent. If you have a diagnosed knee condition, check with your doctor before any trail with significant elevation loss.
Is there a hiking knee pain fix I can use immediately while on trail?
Yes. Two of them. Shorter stride and trekking poles provide immediate, measurable relief for most hikers and require nothing beyond what you are already carrying. The hiking knee pain fix that takes the most time is the strengthening work in Fix 4. The one you can use right now on a descent is Fix 2: shorten your steps so your foot lands 18 to 24 inches in front of your body, not 30 to 36. Most hikers notice a difference within 10 minutes of making the change.
Why do my knees hurt walking downhill even on short hikes?
Knee pain on short hikes usually points to one of three things: footwear with a soft midsole that does not cushion repetitive impact well on trail, quads that fatigue faster than expected because downhill hiking uses them differently than walking on flat ground, or stride mechanics that load the kneecap on each step. A 2-mile trail with 400 feet of descent concentrated in half a mile is enough to trigger this for many beginners. Check all three before attributing it to fitness level alone.
Knee Pain Hiking Downhill Is a Technique Problem First
Knee pain hiking downhill is common. It is not inevitable.
The two fixes that produce the fastest change are stride mechanics and trekking poles. Start there before anything else. If those do not fully resolve it, the strengthening work in Fix 4 addresses the underlying muscle weakness, and trail selection cuts the problem off before it starts. Most hikers who apply these consistently stop thinking of the descent as the part of the hike to get through. That is the actual goal: a hike where the full trail, not just the climb, feels worth doing again.
Next Steps
- Right now: Open your last trail on AllTrails. Find the elevation profile. Was the descent steep and concentrated, or gradual over distance? That tells you whether trail selection is part of your knee pain situation.
- Before your next hike: Try the step-down exercise from Fix 4 for two weeks: three sets of 10 per leg, twice a week. It takes about 8 minutes per session.
- Day of: Shorten your stride before the descent starts, not after your knees start hurting. Implement Fix 2 at the top of the first downhill section
Spent ten minutes at a loop trailhead entrance genuinely paralyzed over whether to go clockwise or counterclockwise, knowing one started uphill and one didn’t? Here’s the real answer on hiking uphill or downhill first and why the order actually matters more than you’d expect.
Expected the usual post-workout soreness after your first hike and got something completely different in places you didn’t even know could be sore? Here are 7 body changes first-timers notice that are completely normal but almost never talked about beforehand.
Bought brand new hiking socks, laced up properly, did everything right, and still ended up with a blister that ruined the last two miles? Here are 8 fixes that actually prevent blisters so the right prep actually delivers on its promise.
Pushed through a hike that left you completely wrecked and started wondering if everyone else was just built differently than you? Here’s an honest look at why hiking feels so brutal at first and the specific point where your body actually starts catching up.
Reached that point on a steep section where your legs were done, your lungs were done, and your brain was about thirty seconds behind? Here are 6 mental tricks for pushing through when hiking gets hard that work even when every other part of you wants to sit down.