



Definition: A switchback is a trail that zig-zags across a steep slope to reduce the climbing angle. If you have ever stood at the base of a steep mountain trail and watched the path cut back and forth across the hillside in a zig-zag pattern instead of heading straight up, you are looking at switchbacks in action. Trail builders design switchbacks to turn grueling vertical ascents into gentle, manageable slope grades while protecting delicate hillside soil from rainwater erosion.
⚡ Quick Trail Takeaways
- Purpose: Switchbacks reduce steep incline grades by weaving back and forth up mountain slopes.
- Never Cut Switchbacks: Shortcuts accelerate severe soil erosion and destroy trail integrity.
- Pacing Tip: Slow down momentum when approaching turn corners to save quadriceps energy.
The first time I encountered one without knowing what it was, I thought the trail was looping back on itself. I actually stopped and double-checked the AllTrails map because I was convinced I’d taken a wrong turn. The path kept appearing above me as I walked, running in the opposite direction, and it looked like the route made no sense. Then I got to the first turn, looked down at where I’d been, and understood immediately. The trail wasn’t confused. I was.
Switchbacks are the most efficient path up a steep slope. Once you understand how they work, steep climbs start making sense in a way they didn’t before. This guide covers what are switchbacks in hiking, the geometry behind them, and the technique that makes them far less draining than going straight up.
| Trail Design | Elevation Grade | Cardio Demand | Soil Erosion Risk |
|---|---|---|---|
| Switchback Path | Gradual (5% – 12%) | Manageable & Sustainable | Low (Water Runoff Managed) |
| Direct Steep Climb | Severe (25%+ Grade) | Extreme Energy Spike | High (Destroys Trailside Soil) |
🥾 Oliver’s Trail Notes & Field Observations
Climbing the steep switchbacks of Mt. Baden-Powell toward the 9,399-foot summit taught me the discipline of mountain pacing. In my experience, beginners blow out their quadriceps because they attack switchbacks at their flat-ground walking speed. When I shortened my stride length by half and synchronized my footfalls with steady nasal breathing, I ascended 2,800 vertical feet without needing exhausting stop-and-go recovery breaks.
What Are Switchbacks in Hiking: The Full Answer
Switchback definition: what the word actually means
A switchback is a trail segment that reverses direction at a sharp turn, creating a zigzag path up a steep slope. The switchback definition comes from the shape: you hike in one direction, reach a turning point, then hike back at an angle, gaining elevation with each pass. Understanding what are switchbacks in hiking starts here: from above, the pattern looks like a series of connected Z or W shapes drawn up a hillside.
The term applies to both the overall pattern and each individual turn. A trail can have six switchbacks, meaning six sharp reversals of direction. The turns are sometimes called switchback corners, and on busy trails those corners show the most wear because hikers want to cut straight through rather than follow the curve.
One related term worth knowing: a switchback is not the same as a hairpin turn, though the two are often used interchangeably. Technically, a hairpin is the turn itself. A switchback refers to the whole zigzag section, including the traversing legs between turns. In trail conversations, both words mean the same thing.

Switchback trail explained: the geometry that makes it work
Here’s why trails have switchbacks instead of going straight up steep terrain. The key is grade: the steepness of a slope expressed as elevation gained per horizontal distance traveled.
A trail going straight up a 30-degree slope has a grade of roughly 58%. That grade is physically brutal to hike for any sustained distance, and it causes serious erosion because rainwater channels directly down the path. Most trail building standards target a maximum sustainable grade of 10% to 15% for maintained hiking trails. On steep terrain, the only way to stay under that grade without tunneling through the mountain is to traverse the slope at an angle and reverse direction repeatedly. That traversing and reversing is what creates the switchback trail pattern.
Understanding what are switchbacks in hiking means understanding that you’re covering significantly more horizontal ground to manage vertical gain. A slope that would require a 58% grade to climb directly can be hiked at 12% grade if the trail traverses it with long legs and tight turns. The trail is longer. Each step costs less.
Hiking trail terminology: where switchbacks fit
Switchbacks appear on almost every trail with real elevation gain, making switchback a trail term beginners will encounter constantly. A 2-mile trail gaining 1,000 feet via switchbacks feels different from a 4-mile trail covering the same elevation at a gradual grade. The switchback trail concentrates the gain and covers it efficiently, but the turns and traversing legs create a distinct rhythm that takes a few hikes to internalize.
Other terms you’ll see alongside switchbacks: the straight segments between turns are called traverses. The turns themselves are switchback corners. The full zigzag section is sometimes called a switch section in trail guides.
Why Do Trails Have Switchbacks
The erosion argument is the real reason
Most beginners assume why do trails have switchbacks comes down to hiker difficulty. Make the climb easier. That’s true, but it’s secondary. The primary reason trail builders use switchbacks is erosion control.
A trail going straight up a steep slope becomes a water channel in rain. Runoff has no reason to leave the path because the path is already the lowest point on the slope. That water accelerates down the trail, stripping topsoil, exposing roots, and creating ruts. The American Hiking Society tracks trail degradation data showing that improperly graded trails without adequate water management are the most common source of unsustainable trail damage in high-use areas.
A switchback trail solves this by breaking the slope into traversing legs that cross the fall line rather than following it. Water doesn’t run along the trail; it crosses it. Properly designed switchbacks have outsloping on each leg so water sheds off the trail edge rather than pooling.
The grade management argument for hikers
The second reason why do trails have switchbacks: sustainable grades for real hikers over real distances. A trail with sections above 20% grade becomes unmanageable for most people within a quarter mile. Legs burn out, traction fails on loose dirt, and the physical demand stops being recreation.
The USDA Forest Service trail design standards cap sustainable grade at 12% to 15% for maintained recreational trails. When terrain demands more elevation than that grade allows, switchbacks are the solution. A trail engineer facing a 600-foot rise in 0.3 miles can make that elevation accessible at 12% grade by routing through switchbacks that traverse 2.5 miles of horizontal distance to cover the same vertical rise.
That math answers what are switchbacks in hiking at a practical level: you walk further so each step costs less.
🥾 Switchback Cutting Hazard Note
During field patrols in the Angeles National Forest, I repeatedly witness hikers shortcutting switchback corners to save ten yards of walking. In my testing of trail erosion patterns on loose decomposed granite, a single boot cut creates a drainage channel that washes out the trail bench during the next rainstorm. I learned that cutting corners destroys trails and regularly dislodges fist-sized rocks onto unsuspecting hikers below.
How to Hike Switchbacks Without Burning Out
The pace adjustment that changes everything
Most hikers approach what are switchbacks in hiking as a cardio problem: push through, breathe hard, get to the top. That works for a single short series. For a 600-foot switchback climb across 8 turns and half a mile of traversing legs, it depletes you in the first two turns and makes the rest of the climb a slog.
How to hike switchbacks comes down to one rule: slow your pace before you reach the first turn, not after you’re already burning. On flat or gradual terrain leading to the climb, drop to roughly 80% of your comfortable walking pace. Your legs will be warm from the approach, your cardiovascular system ready, and you’ll enter the first switchback with capacity in reserve.
The reason this matters specifically on switchback trails: each turn is a natural stopping point. Most hikers stop at the turns because they’re tired and the turn gives them an excuse. If you’re managing pace, you don’t need to stop at every turn. Moving slowly and steadily through a switchback series is faster and less taxing than pushing hard and stopping repeatedly.
Setting your switchback pace before the climb
A pace test before any sustained switchback series: slow to a speed where you can complete a full sentence out loud without pausing for breath. Not a comfortable murmur. An actual sentence. That’s your switchback pace. Faster than that and you’re accumulating cardiovascular debt that will show up at turn 4.
Resist the temptation to accelerate on the traverses; they’re not recovery. They’re the working section of the climb.
Reading the terrain ahead on a switchback trail
One practical advantage of switchback trail geometry: you can see the next leg of the trail from your current position. When you’re traversing left, the right-traversing leg above you is visible on the slope. Use that visibility to read what’s coming. Rocky section ahead? Start picking your footing now. Shaded section above the next turn? That’s where you’ll take your water break if you need one.
How to handle the turns without losing momentum
The switchback corners are where most beginners lose time and energy. The instinct at a tight turn is to slow almost to a stop, navigate the corner awkwardly, and restart momentum on the new leg. On a trail with 12 turns, that stop-and-restart cycle costs significant energy.
The technique: tighten your stride length about four steps before the corner, make the turn with a shorter deliberate step, and resume your pace immediately on the new leg. Reduce speed without stopping, carry some momentum through the corner, and don’t rebuild from zero on every new leg.
On wider turns, this is easy. On tight corners with loose rock or exposed root, stop completely if the footing demands it. Safety at the turn matters more than momentum.
The shortcut problem: why cutting switchbacks damages trails
I cut switchbacks on my third or fourth hike. The shortcut looked obvious: a straight line through the brush between two traversing legs, saving maybe 80 meters. I did it without thinking.
I stopped after learning what it does. The vegetation between switchback legs holds the soil together. Foot traffic across that slope destroys root systems, compresses the soil, and creates a new water channel directly down the hillside. Repeat across dozens of hikers doing the same shortcut and you have an erosion scar that takes trail crews significant time to repair. On popular trails, shortcut damage is visible as brown gashes between the proper switchback legs.
The Leave No Trace Center for Outdoor Ethics specifically lists switchback shortcutting as a primary cause of trail erosion on mountain trails. Part of understanding what are switchbacks in hiking is understanding that the extra 80 meters is not wasted distance. Stay on the trail through every turn.
Common Mistakes on Switchback Trails
Treating every turn as a rest stop
The most common error on what are switchbacks in hiking: stopping at every corner whether you need to or not. The turns are a natural pause point and they feel like the right moment to catch your breath. On a series with 10 turns, stopping for 30 seconds at each one adds 5 minutes to the climb and disrupts the steady rhythm that pacing creates.
Rest when you need to rest, not at every turn by default. Stopping at every single corner is a sign your pace entering the series was too fast, not a sign that the corners require stopping.
Going too hard on the traversing legs
The traverses feel easier after a tight turn, and there’s a temptation to accelerate and make up time. That depletes the reserves needed for the next series of corners and legs. The traverse is not a recovery. It’s the working section. Consistent pace across both legs and turns is the whole technique.
Not drinking water on the approach
On a switchback climb, the thirst signal often arrives at turn 3 or 4 when you’re already behind on hydration. Drink before the switchback series starts, on the flat approach terrain. Half a liter before a sustained switchback climb of 600 feet or more means you’re entering the hardest section hydrated.
Misjudging the distance
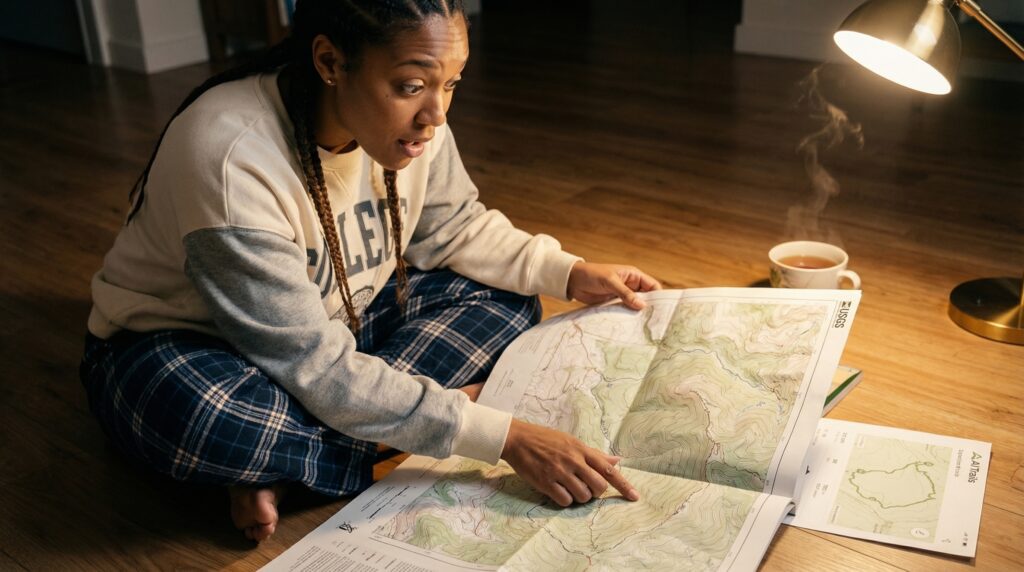
A trail map shows straight-line distance. A switchback trail covers significantly more actual ground. A trail that looks like 0.4 miles on a map but gains 500 feet via switchbacks might cover 1.2 miles of actual distance once the traversing legs are unfolded. Check total trail distance on AllTrails, not the topo map, when planning a switchback-heavy route.
When to Slow Down or Change Your Plan
Switchbacks concentrate elevation gain, which means they concentrate physiological demand. If your breathing hasn’t settled to a conversational pace within the first two turns, slow down right then. Slowing by 20% at the moment breathing becomes labored costs almost no time. Grinding through four more turns at the wrong pace and stopping for three minutes costs more.
Signs to cut the climb short: you’ve stopped at four consecutive corners because you genuinely needed to. Your legs feel heavy on the traverses. You’re at 50% of your estimated time budget and the top is not visible. Any of these means reducing the day’s plan rather than pushing through to a summit you’ll need to descend on empty legs.
Set a turnaround time before you start. If you reach a turn and that time has passed, turn around from that point. The view from turn 7 of 12 is still a view.
What are switchbacks in hiking and why do beginners find them confusing?
What are switchbacks in hiking at the simplest level: a trail pattern where the path zigzags up a steep slope by reversing direction repeatedly instead of climbing straight up. Beginners find them confusing on a trail map because the route appears to double back on itself, which looks like a mistake. It isn’t. Once you’re on the trail and can see the legs above you on the hillside, the geometry makes immediate sense.
What is the switchback definition and where does the term come from?
The switchback definition is a trail segment that reverses direction at a sharp angle, creating a zigzag path up steep terrain. The word came from railroad engineering: trains on steep mountain grades would back into a spur, then continue forward on a higher track. Trail builders borrowed the term, and it now applies to any trail using the zigzag pattern to manage steep elevation gain. You’ll also hear “hairpin” for the turns themselves, and both words are acceptable in trail conversation. Knowing what are switchbacks in hiking and what drives the trail pattern gives the terminology real meaning rather than just vocabulary.
Why do trails have switchbacks instead of going straight up?
Why do trails have switchbacks comes down to two reasons. First, grade management: a straight-up trail on a 30-degree slope has a grade too steep for most hikers to sustain and too steep for trail maintenance standards. Switchbacks reduce the grade by increasing horizontal distance, making the same elevation gain achievable at 10% to 15% grade. Second, erosion control: a trail running straight down a slope channels rainfall directly downhill, stripping topsoil with every rainstorm. A switchback trail crosses the slope so water sheds off the trail edge rather than funneling down the path.
How to hike switchbacks without burning out on the climb?
How to hike switchbacks without burning out: slow down before you reach the first turn, not after you’re already struggling. Target a pace where you can speak a full sentence without pausing for breath. Hold that pace through both the traversing legs and the turns. Resist stopping at every corner by default. Drink water on the flat approach before the climb starts. Do not cut the corners between switchback legs. It damages the trail and saves no meaningful time.
Does a switchback trail explained on a map always look longer than it actually is?
The opposite: a switchback trail explained on a topo map always looks shorter than it actually is. The map shows the horizontal footprint of the zigzag, which compresses actual trail distance significantly. A 400-foot straight-line distance on a map might represent 1.2 miles of actual trail. Always use the total trail distance from AllTrails or the land manager’s trail page when estimating time and water needs.
Is switchback a piece of standard hiking trail terminology I need to know?
Yes. Switchback is a trail term you’ll encounter constantly in trail descriptions, and once you know what are switchbacks in hiking, you’ll read trail guides differently. You’ll also hear it as shorthand for climb intensity: “the last mile is all switchbacks” tells an experienced hiker exactly what to expect. Other related terms: traverse (the straight leg between turns), grade (steepness as a percentage), and fall line (the direction water runs down a slope, which switchbacks are designed to cross).
Switchbacks Make Steep Trails Possible
What are switchbacks in hiking boils down to this: they’re the engineering solution that turns a slope too steep to hike into a trail anyone can climb at a manageable pace.
The first time you recognize a switchback series for what it is, the trail makes more sense. The path isn’t wandering. It’s working with the terrain instead of fighting it. And once you know how to hike switchbacks at a consistent pace without burning out in the first few turns, what used to look like the hard part of a trail becomes the most predictable part.
Before your next hike, check the elevation profile on AllTrails and find sections where the gain spikes sharply. That’s where the switchbacks are. You now know what to expect.
Next Steps
- Right now: Pull up any trail you’re planning on AllTrails and look at the elevation profile. A steep spike over a short distance means switchbacks. That knowledge changes how you plan your pace.
- Before your hike: Set your switchback pace at home using the sentence test: if you can’t complete a sentence without pausing for breath, slow down.
- On the trail: Count the turns in a switchback series when you can see them from below. Knowing there are 8 turns versus 4 changes how you ration your energy across the climb.
Frequently Asked Questions
Why is cutting switchbacks bad?
Cutting switchbacks destroys vegetation and creates a direct path for water to flow downhill, which rapidly erodes and destroys the entire trail structure.
Do switchbacks make a hike longer?
Yes, they add distance to the hike in exchange for significantly reducing the steepness of the climb.
Related Reads
Stood at a loop trailhead unsure if you should tackle the climb first or save it for last? Here’s the real answer on hiking uphill or downhill first, and it’s not as obvious as it sounds.
Tossed and turned the night before your first hike, replaying every “what if” in your head? Here’s exactly what to expect so you walk in feeling ready instead of guessing in the dark.
Found yourself completely gassed by the time everyone else was just warming up? These 7 pacing techniques close that gap so your energy actually lasts the full trail.
Agreed to a trail distance because it was the only option in the group chat, not because it fit you? These 5 rules help you push for a number that’s actually realistic for where you’re at right now.
Wondered why a short trail wrecked you while a longer one felt manageable? This explains the real culprit — it’s the climbing, not just the mileage, doing the damage.