

If you want to know how to plan a hiking trip for beginners, the honest answer is that the planning takes longer than most people expect. Almost none of that time is about gear.
⚡ Quick Trail Takeaways
- Route Selection: Choose well-marked loops under 5 miles with clear elevation profiles matching current fitness.
- Weather Window Check: Inspect hourly mountain forecasts (e.g. NOAA/Mountain-Forecast) 12 hours and 2 hours before departure.
- Safety Contact Protocol: Leave a written trip plan with an emergency contact stating exact trailhead, vehicle plate, and overdue time.
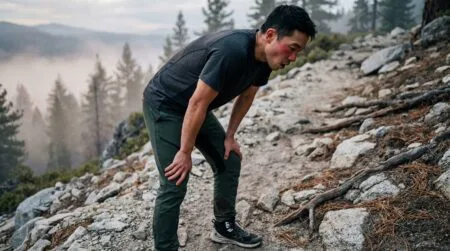
I learned this on what I’d call my first “real” hike attempt. I found a trail near Sedona, Arizona, based on a photo I’d seen on Reddit. It looked beautiful. I picked it entirely on that basis. I did not check the distance (7.2 miles), the elevation gain (1,400 feet), or the temperature forecast (high of 101°F). I brought one 1-liter water bottle and started at 9:45 AM. I turned around at mile 2.5, overheated and embarrassed, and sat in my rental car with the AC on full for 45 minutes before I felt normal again.
Every part of that failure was a planning failure, not a fitness failure.
This guide covers every step of beginner hiking trip planning, in order, with the specific decisions you need to make before you leave your driveway.
How to Plan a Hiking Trip for Beginners: 9 Steps That Actually Work
Step 1: Pick a trail that matches where you are right now
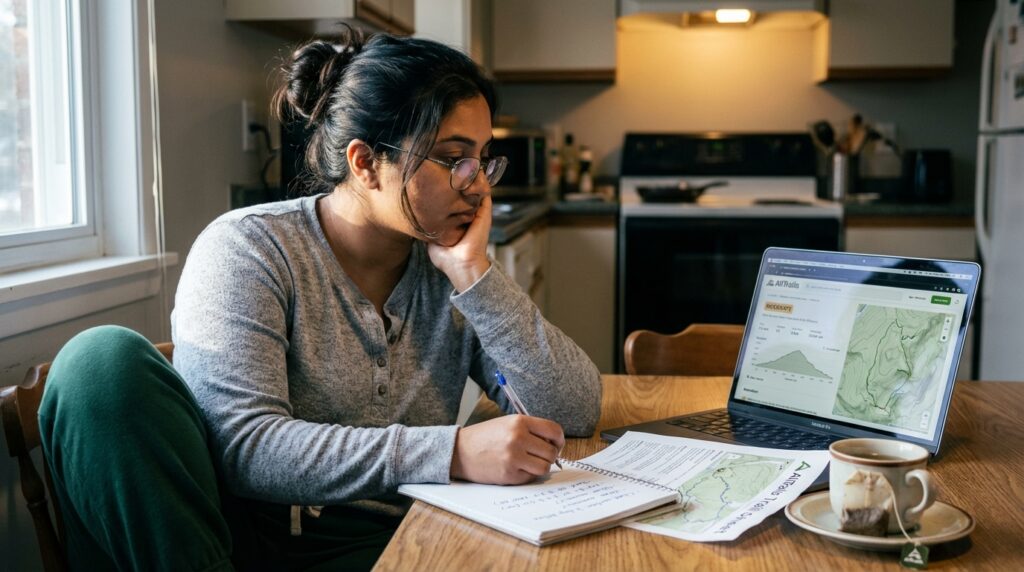
This is where most first-timers go wrong, and the reason is simple: trail descriptions are not calibrated for beginners. A trail rated “moderate” on AllTrails is moderate for someone who goes outside regularly. That is not you yet, and that is completely fine.
For your first hike, use three filters: under 5 miles total distance, under 500 feet of elevation gain, and well-marked with clear junctions. Those three filters eliminate most trails that will make a first experience unpleasant.
My honest recommendation is stricter than that. If you’ve been mostly sedentary over the past few months, keep your first hike under 4 miles with minimal elevation. You want to finish feeling like you could have kept going. That specific feeling (slightly tired, not destroyed) is what gets people to come back.
How to find beginner trails near you
AllTrails has the largest database of US trails and the most useful filter system for beginners. Set distance to under 4 miles, difficulty to “easy,” and read the most recent reviews from the past 30 to 60 days before committing to any trail. Recent reviews tell you actual current conditions. The trail description does not.
The American Hiking Society trail finder is worth checking alongside AllTrails if you’re near national forest or BLM land, where AllTrails data can be thinner.
Step 2: Check trail conditions and weather before you book anything
The single step most people skip when figuring out how to plan a hiking trip for beginners is conditions research. Weather and trail state are as important as the trail itself, and both change constantly.
What to look at and where to find it
Check the weather at the National Weather Service mountain forecast for the trail’s specific area, not the nearest city. A city 20 miles from your trail at lower elevation can show 78°F and partly cloudy while the trail is 90°F on an exposed ridge with afternoon storm cells building. These are genuinely different forecasts.
Three weather conditions that should change your plan: a forecast high above 90°F without a shadier trail option available, afternoon storm probability above 40% in regions prone to convective weather, and sustained winds above 25 mph on exposed ridges. None of these make hiking impossible for an experienced hiker. For a first-timer, any one of them warrants choosing a different day or a different trail.
After weather, pull the AllTrails page for your specific trail and scroll to the most recent reviews. Look for trail condition mentions from the past 30 days: muddy sections, downed trees, washed-out segments, parking issues. One detailed review from three weeks ago is worth more than 200 five-star reviews from last summer.
Step 3: Build your first hike checklist before you touch your pack
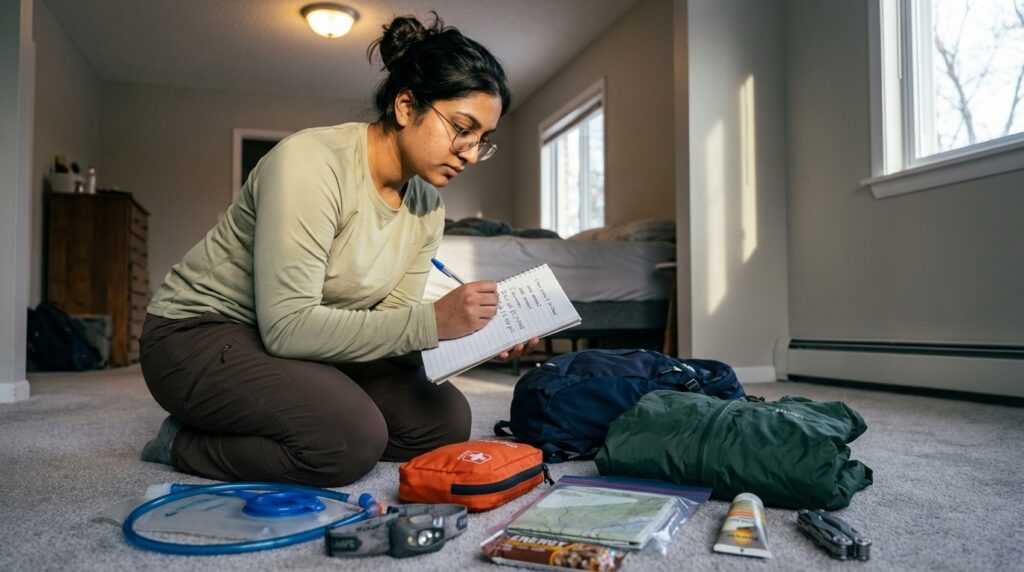
A beginner hiking trip planning mistake I see constantly: people start throwing items into a bag and then wonder what they’re forgetting. Work from a list. Your instincts about what to bring are calibrated by things you’ve seen on TV, not by actual trail experience.
What goes on a first hike checklist
Your first hike checklist needs four categories covered before you add anything else.
Navigation: Download the trail on AllTrails for offline use the night before you go. Not a screenshot of the map, but the actual offline download so GPS tracking works without cell data. Do this at home where your connection is reliable, not in the parking lot with one bar of signal.
Water: Plan for 500ml per hour of hiking in cool weather (under 70°F), and 750ml per hour when it’s above 75°F. For a 3-hour hike on a mild day, that math is 1.5 liters. Bring 2 liters. You will almost never drink too much water on a day hike, and you will always regret drinking too little.
Clothing: Check both the trailhead temperature and the highest point temperature. Temperature drops roughly 3.5°F per 1,000 feet of elevation gain. A comfortable 65°F morning at the trailhead with a 1,500-foot climb puts the high point around 60°F on a calm day. Pack one layer you can add.
First aid: Buy a pre-built kit, not a collection of items from a medicine cabinet. The Adventure Medical Kits Ultralight Watertight .7 covers blisters, wound closure, bandaging, and basic pain relief for about $24. Open it at home and read through the contents once before your hike. A first-aid kit you’ve never opened is almost useless in the field.
Secondary items that still belong on the list: SPF 30+ sunscreen applied 15 minutes before you leave the car, sunglasses, a brimmed hat, a snack beyond what you plan to eat, and a headlamp with fresh batteries even for a morning hike.
💡 Trail Tip: Tell someone exactly where you’re hiking before you leave. Not just “going hiking”: the trail name, the trailhead parking lot name, your planned return time, and what they should do if you haven’t checked in by then.
This takes 90 seconds and is the single most useful safety habit you can build before any hike.
Step 4: Plan your hiking trip itinerary using actual time math
How to estimate trail time as a beginner
The standard hiking estimate: 30 minutes per mile, plus 30 minutes for every 1,000 feet of elevation gain. That gives you a middle estimate. For your first hike, add 25% on top of that number. Beginners take more breaks, move more cautiously on descents, and stop to look at things. None of that is a problem. It takes time.
A hiking trip itinerary that works starts with your start time, then selects a trail that fits inside the available window. Not the other way around.
For summer hiking, the rule is direct: be on trail no later than 7 AM if the forecast high exceeds 85°F. A 7 AM start on a 3-hour hike has you back at the trailhead by 10 AM, before the heat of the day peaks. A 9:30 AM start on the same trail puts you finishing at 12:30 PM in climbing heat. The trail is identical. The experience is completely different.
For spring and fall hikes when daily highs stay under 75°F, an 8 AM start is workable. In winter, the concern shifts from heat to daylight: finish your hike with at least 90 minutes of daylight remaining.
Write down four things before you go: your start time, your planned turnaround point, your estimated finish time, and the person you told about the hike. Share all of it.
Step 5: Understand what gear you actually need right now
What beginners need versus what the gear industry wants them to think they need
The outdoor gear industry profits from beginner uncertainty. This is stated plainly because the honest answer to most gear questions at this stage is: you need less than you think.
For your first hike, here is what you need. Footwear you have already worn for multiple hours before the hike. Either trail runners or beginner-tested boots like those in our Merrell Moab 3 review work; both fail if worn for the first time on trail. Moisture-wicking socks, not cotton (cotton holds sweat and creates blisters in under 3 miles). A daypack in the 20 to 25 liter range. A reliable water bottle or hydration bladder.
What you do not need immediately: trekking poles. While our trekking poles for beginners guide breaks down when poles actually earn their weight on descents, they are unnecessary for flat starter routes, a dedicated GPS device (your phone running AllTrails handles this), or hiking-specific pants (athletic shorts or leggings work fine for day hikes in reasonable conditions).
The one gear investment worth making immediately: wool or synthetic hiking socks. A pair of Darn Tough or REI Co-op hiking socks costs around $18 and prevents more problems on a first hike than almost anything else in the gear category.
💡 Trail Tip: Walk in your hiking footwear for at least 2 miles before the day of your hike. Not on the trail. Two or three 30-minute walks in the days before.
Most beginner foot problems come from footwear that hasn’t conformed to the foot yet. Breaking this in before the hike costs nothing and prevents the blisters that end first hikes early.
Step 6: Do the water and food math with actual numbers
Water planning that works on trail
For hikes under 3 hours in mild weather: 2 liters minimum. Add a third liter if the forecast high is above 80°F or the hike involves more than 1,000 feet of elevation gain. Add a fourth if you’re going above 6,000 feet or hiking longer than 4 hours.
Don’t rely on thirst as your drinking cue. On trail, thirst lags behind actual hydration needs. Set a reminder on your phone to drink every 20 to 25 minutes and take a few swallows when it goes off, whether you feel thirsty or not.
For food: pack more than you plan to eat. A Clif bar and a small bag of trail mix weighs almost nothing and turns a dragging last mile into a manageable one. If the hike is over 2 hours, plan to eat something at or just before the halfway point. Not when you feel hungry. At the halfway mark.
Step 7: Do a full logistics check the night before
How to organize a hike so nothing gets left behind
How to organize a hike well: do everything the night before. Pack the bag completely. Lay your clothes out. Charge your phone to 100%. Download the offline trail map on AllTrails. Check the morning weather forecast one more time.
The morning of a hike is not the time to figure out where your water bottle is. The morning of a hike, you eat breakfast, get in the car, and drive. Every task pushed to the morning adds friction, and friction at 5:30 AM turns a planned 7 AM trailhead start into a 9 AM actual start.
Set two alarms. One for your wake-up. One as a departure alarm that accounts for actual drive time, not the time Google Maps shows when traffic is light.
Step 8: Know three trail etiquette rules before you go
Trail etiquette is one of the parts of how to plan a hiking trip for beginners that most guides skip entirely. You don’t need a course on it. Three rules cover most situations.
Uphill hikers have the right of way. If you’re descending and someone is climbing toward you, step to the side and let them pass. Breaking momentum on a steep uphill section is genuinely fatiguing in a way that stopping on a downhill is not.
Stay on the marked trail. Cutting switchbacks damages trail surfaces and causes erosion. Wandering off trail on an unfamiliar route is the most common way beginners end up disoriented. At any junction where you’re not sure, stop and check your AllTrails map before choosing a direction. Leave No Trace principles exist because the trails that remain open are open because enough people treated them with care.
Pack out everything you packed in. All wrappers, all food scraps, all of it.
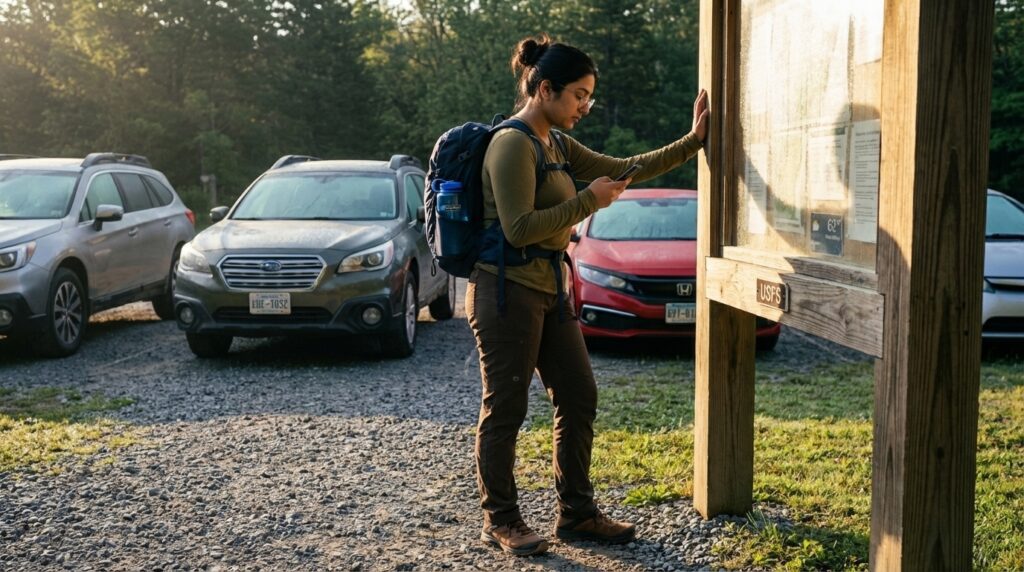
Step 9: Set your turnaround point before you take the first step
How to plan a hiking trip for beginners: the turnaround decision
Decide your turnaround rule at the trailhead, before you start walking. A concrete rule: turn around at the halfway mileage mark regardless of how you feel, or by a specific time. For example, no later than 10:30 AM if you need to be off trail by 1 PM.
The reason this matters before you feel the need for it: hikers who skip a planned turnaround point almost universally describe feeling fine when they crossed it. The problem is that the return half of any hike takes longer than the outbound half. Legs are tired, the novelty has worn off, and pace drops. A hike where you felt great at mile 2 can become a miserable 2-mile return if you pushed past your turnaround point to mile 3.
Set the rule before you start. Follow it even when you feel like you have more in the tank.
How to Plan a Hiking Trip for Beginners: FAQ
What’s the first step in planning a hiking trip for beginners?
The first step in planning a hiking trip for beginners is picking the trail before you touch your gear. Choose a trail under 5 miles, under 500 feet of elevation gain, well-marked, with positive recent reviews. Everything else (what to pack, when to start, what to eat) depends on which trail you’ve selected. Most first-timers start with gear and then pick a trail. Doing it the other way around prevents the most common planning errors.
What should go on a first hike checklist?
A first hike checklist for a beginner day hike covers: a downloaded offline trail map on AllTrails, at least 2 liters of water, one moisture-wicking base layer plus one extra layer, SPF 30+ sunscreen with sunglasses and a hat, food beyond what you plan to eat, a headlamp with fresh batteries, and a pre-built first-aid kit. Everything fits in a 20 to 25 liter daypack at under 10 pounds. That’s the minimum. Everything else is optional.
What’s a realistic hiking trip itinerary for someone on their first hike?
A realistic hiking trip itinerary for a beginner: trail under 5 miles, start by 7 AM in summer or 8 AM in spring and fall, turnaround point set at the halfway mark, back to the trailhead with at least 90 minutes of daylight to spare. Estimate 30 minutes per mile plus a 25% buffer for breaks and slower pace on unfamiliar terrain. Write the schedule down and share it with someone before you leave.
How do I organize a hike if I’ve never planned one before?
Organizing a hike for the first time comes down to six decisions made in advance: which trail, what time to start, what to pack, how much water to bring, who knows where you’re going, and where your turnaround point is. The night before is when you do most of this work. Pack the bag completely, download the offline map, charge your phone, check the morning weather, and set two alarms. The morning of the hike, there should be nothing left to figure out.
What does beginner hiking trip planning actually involve beyond gear?
Beginner hiking trip planning is mostly not about gear. The meaningful decisions are: trail selection based on current fitness, start time based on weather and available daylight, water math based on hike duration and forecast temperature, and a turnaround rule set before you start moving. Most beginners get the trail selection roughly right and then skip everything else. That’s why a lot of first hikes are harder than they needed to be. Not because the trail was wrong, but because the planning behind it was incomplete.
How long should a first hiking trip take?
For most beginners, a first hiking trip of 2 to 3 hours on trail is the right target. That maps to roughly 2 to 4 miles on flat to moderate terrain. Long enough to feel like a real hike. Short enough that the last mile isn’t a grind. Planning outdoor adventures well at the start means calibrating the first few experiences to end with something left in the tank. Finishing a 3-mile hike wanting more is far better than finishing a 7-mile hike and swearing off hiking for six weeks.
Start With the Trail. Everything Else Follows.
Knowing how to plan a hiking trip for beginners comes down to one sequencing decision: pick the trail first, check conditions second, build your kit third. Most people reverse this and wonder why their first hike felt harder than it should have.
The trail you pick determines everything downstream: your start time, your water math, your estimated return, your turnaround point. Get that one decision right and the rest of the planning follows logically.
Pick a trail shorter than you think you need. Start earlier than feels necessary. Tell someone where you’re going. Drink water before you’re thirsty. Turn around when you said you would.
Next Steps
- Right now: Search AllTrails for trails under 4 miles within 30 minutes of your location. Filter by “easy.” Read the three most recent reviews for any trail you’re considering before committing.
- This week: Build your first hike checklist using the four categories in Step 3. Buy anything missing. The items most first-timers skip: a pre-built first-aid kit and wool or synthetic hiking socks.
- Night before: Pack completely. Download the offline trail map on AllTrails at home, not in the parking lot. Set two alarms: one for wake-up, one for departure.
Related Reads
Heard someone use “trekking” and “hiking” like they meant the exact same thing and wondered if you were missing something? Here’s the actual difference between hiking and trekking, and it’s not just a fancier word for the same activity.
Felt that gut-drop moment when nothing on the trail matched what your map was telling you? Here are 5 steps to actually follow if you get lost hiking, the kind that keep a stressful moment from spiraling.
Agreed to a trail distance because it was the only option floating around the group chat, not because it actually fit you? These 5 rules help you push for a number that’s realistic for you, no awkward conversation required.
Sprinted out strong at the start only to be the one everyone’s waiting on by the final stretch? These 7 pacing techniques help you hold a steady rhythm instead of burning out early and dragging at the end.
Kept pushing forward on a hike even though something in your gut was quietly telling you to stop? Here’s how to actually know when to turn back before stubbornness turns into a real problem out there.