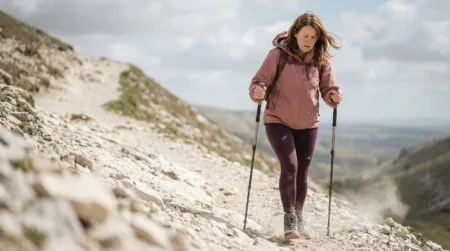


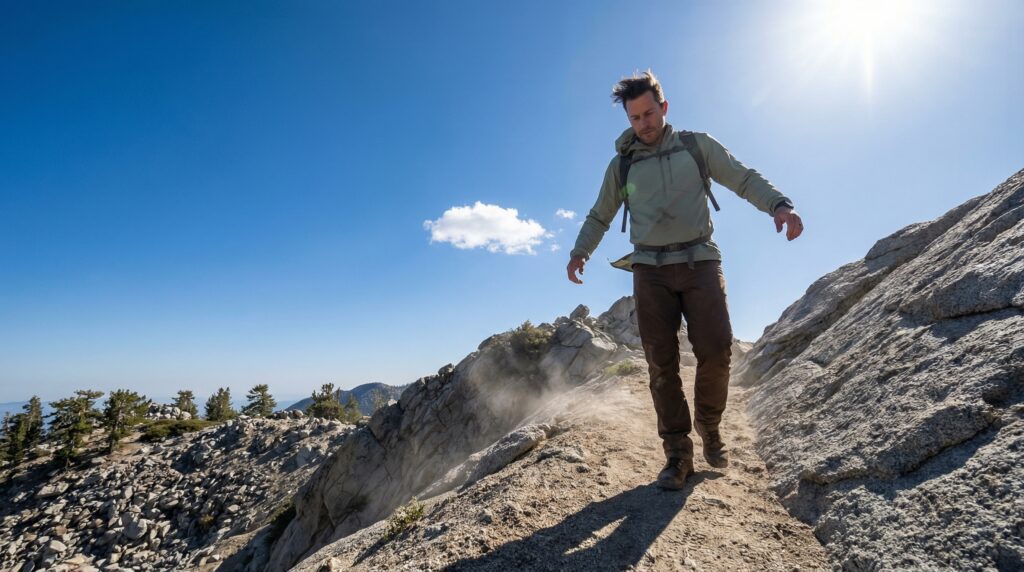
When browsing trail guides or reading reviews on AllTrails, you will frequently see the word “exposed” used to describe a ridgeline path or mountain summit. In hiking terminology, exposure refers to two distinct trail conditions: severe drop-offs where a fall would have serious consequences, or open, shelter-free terrain where you are fully vulnerable to scorching sun, high winds, and lightning storms.
⚡ Quick Trail Takeaways
- Trail Exposure Definition: Refers to high fall consequence (steep drops) or severe weather exposure (no tree canopy/wind shelter).
- Sun & Weather Defense: Carry UPF 50+ sun protection, wind-resistant outer shell, and 1 liter of extra water per 2 hours of open sun.
- Footing Technique: Keep center of gravity low over the midfoot and maintain 3-point contact when scrambling on narrow ledge trails.
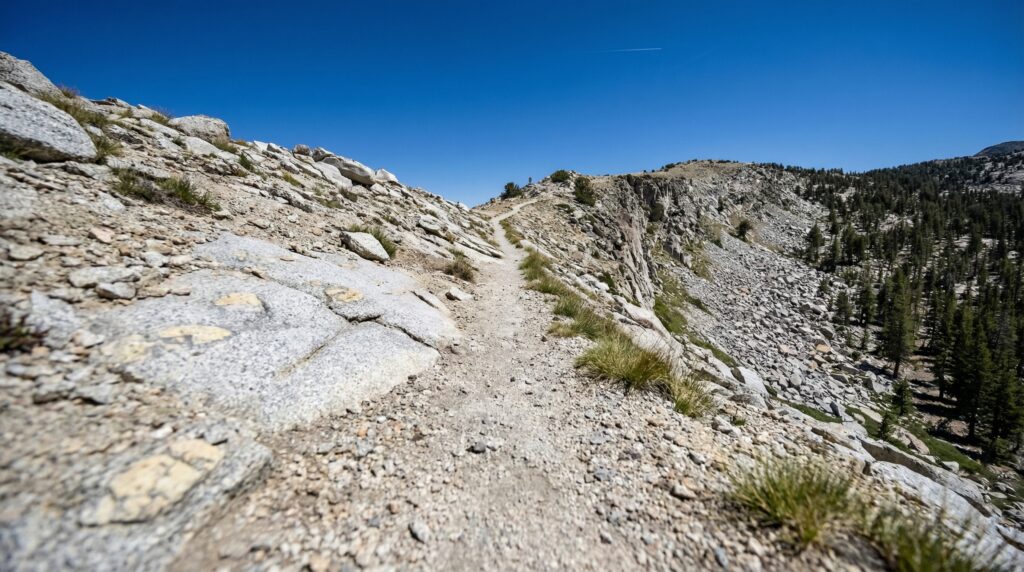
I found out what exposed trail meaning in hiking actually felt like on a trail in the San Gabriel Mountains I’d rated as manageable. AllTrails said “some exposed sections near the ridge.” I pictured maybe a stretch with no trees. What I found was a 200-foot ridge traverse with a steep drop on the right side, a loose-gravel path about 18 inches wide, and wind. I made it across fine. But my heart rate told a different story, and the two hikers who turned around at the start of that section also made the right call for them.
This guide covers exposed trail meaning hiking, the two types of exposure you’ll encounter on trails, how to read trail descriptions to identify them before you go, and the specific decisions that keep exposed sections safe.
🟠 Before You Head Out:
Exposure on trail involves real fall risk. This guide covers preparation
and decision-making, not emergency rescue. If someone falls on an exposed
section: call 911 immediately. In areas without cell service, activate
your PLB or satellite communicator, stay put if safe, and signal for help.Read on for everything you need to assess and prepare for exposure before it appears.
🥾 Oliver’s Trail Notes & Field Observations
When I guided novice hikers along the narrow Devils Backbone ridge on Mt. San Antonio (Mt. Baldy), I observed how height exposure triggers physical paralysis in people unaccustomed to steep vertical relief. In my experience, exposure on a trail map means two distinct threats: sheer cliff drop-offs that demand deliberate footing, and complete solar exposure that drains your body water twice as fast as forested canyon paths.
What Exposed Trail Meaning Hiking Actually Covers
The two distinct types of exposure on trail
The word “exposed” on a trail description covers two different things that sometimes overlap and sometimes don’t.
Vertical exposure is the type most people think of when they imagine an exposed trail. It means the trail has significant drop-offs: a ridge traverse where one or both sides fall away steeply, a section cut into a cliff face, a narrow path above a valley floor. Vertical exposure is about height and the consequence of a fall.
Elemental exposure means the trail is open to the elements: sun, wind, and lightning in particular. Above treeline, a trail may have no vertical exposure at all but full elemental exposure. You’re visible to weather systems, there’s no shade, and if a thunderstorm builds there’s nowhere to take cover. Many alpine trails above 10,000 feet in the American West are elementally exposed even when they’re wide and well-graded.
The reason this distinction matters for beginners: most exposed trail meaning hiking confusion comes from assuming exposure only means heights. You can hike an exposed ridge that’s 6 feet wide with minimal vertical exposure but full elemental exposure. Both are “exposed.” They require different preparation.
What does high exposure mean hiking
What does high exposure mean hiking describes the far end of the vertical exposure scale, well beyond what exposed trail meaning hiking typically signals on maintained day hike trails. High exposure means the drop-off is substantial enough that a fall would be fatal or cause severe injury, with no margin for error.
High exposure is not the same as difficult. A wide, well-maintained trail could have high exposure if it runs along a ridge with 800-foot drops on both sides. A technically demanding scramble could have low exposure if it’s sheltered in a canyon with minimal fall consequence.
Exposed trail meaning hiking on AllTrails and most beginner trail guides rarely reaches the “high exposure” threshold. The sections described as exposed on maintained hiking trails typically involve drops in the 20 to 200 foot range. High exposure in the truest sense belongs to technical mountaineering terrain, outside the scope of beginner hiking.
Exposed Hiking Trails Beginner Guide: What to Expect
How exposure actually feels on trail
Exposed hiking trails beginner hikers encounter for the first time produce a reaction that varies by individual. Some people walk onto a narrow ridge, look at the drop, and feel nothing beyond mild interest. Others feel an immediate physical response: increased heart rate, reluctance to step forward, a pull toward the uphill side of the trail. Neither is right or wrong. They reflect individual differences in the acrophobia response, and neither predicts whether someone can safely hike exposed terrain.
The honest truth about exposed trail meaning hiking and the acrophobia response: some level of automatic caution on genuinely exposed terrain is physiologically normal. Your nervous system is doing what it’s supposed to do. The problem isn’t the response, it’s when it escalates into panic or freezing, which creates danger on sections where fluid movement is safer than stopping.
I’ve watched confident hikers freeze on a ridge traverse with reasonable footing and manageable exposure. I’ve watched people who described themselves as terrified of heights walk that same section calmly. The determining factor wasn’t experience level or stated fear. It was whether they’d been told what to expect and had a plan before arriving at the section.
Hiking fear of heights: the specific difference between caution and a problem
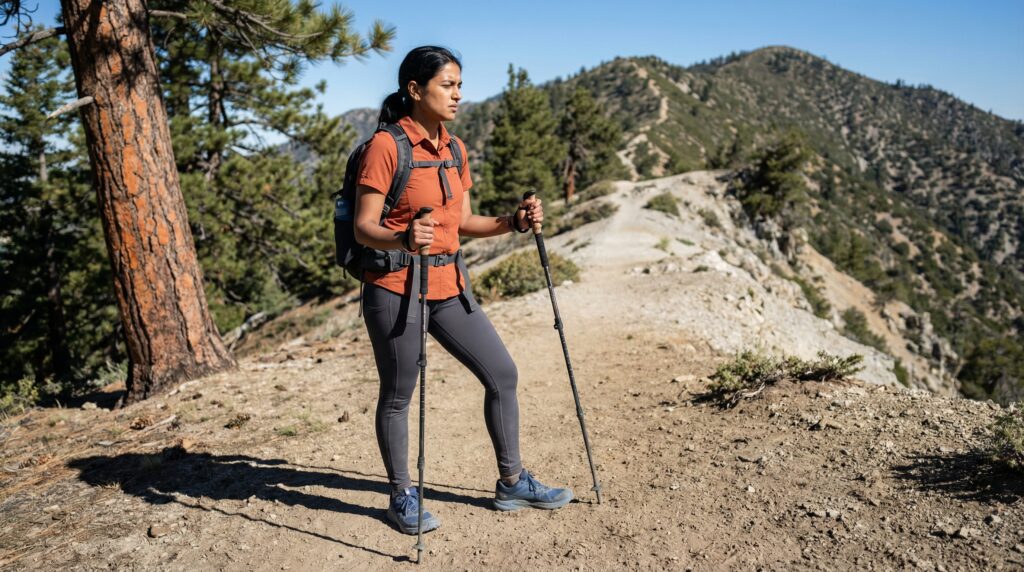
Hiking fear of heights in the context of exposed trail meaning hiking breaks into two categories.
Manageable caution is when you feel the exposure, take it seriously, move deliberately, and keep moving. Your pace slows. You focus on footing rather than the view. You may not enjoy the section, but you get through it safely. This is the normal range.
A problem is when you freeze, panic, or feel physically unable to continue forward or backward. If your legs stop working, if you drop to your hands and knees involuntarily, if a hiking partner needs to talk you through each step, you’ve moved past manageable caution. That’s not a character failure. It’s information about what trail type is right for you right now.
The practical test before you commit to an exposed section
Before stepping onto any section that sounds like scary trails explained in a trip report, ask yourself: if I get to the middle and want to stop, can I safely reverse? On most exposed hiking trails beginners encounter on maintained trails, yes. On narrow ridge traverses, sometimes no, because turning around on a 12-inch path above a drop requires more spatial confidence than continuing forward.
If the answer is no and you’re uncertain about how you respond to vertical exposure, decide before you step onto it, not at the midpoint.
🥾 Wind & Weather Exposure Rule
In my pack on exposed ridge routes like Ontario Peak, I always pack an ultralight windshell and polarized eye protection, even when the valley trailhead is 75 degrees and calm. During my field trials on open ridgelines, wind velocities frequently gust to 35 mph across saddles, dropping windchill rapidly and stripping moisture from your eyes and lips.
Trail Exposure Safety: Reading Descriptions Before You Go
How to identify exposure in trail descriptions
Understanding scary trails explained in trail descriptions starts before you arrive at the trailhead. Trip reports on AllTrails, hiking forums, and National Park Service trail guides use specific phrases that signal exposed sections.
Phrases that mean vertical exposure:
- “Exposed ridge” or “ridge traverse”
- “Airy” (climbing terminology for sections that feel open and high)
- “Drop-off on both sides”
- “Narrow path above [canyon/valley/cliff]”
- “Scrambling section” (often implies some vertical exposure even if the grade is low)
- “Not recommended for those with a fear of heights”
Phrases that mean elemental exposure:
- “Above treeline”
- “No shade after mile [X]”
- “Alpine section” or “open to weather”
- “Start early to avoid afternoon storms” (always signals elemental exposure)
The most reliable source for understanding what exposed trail meaning hiking actually looks like on a specific trail is recent photos in AllTrails reviews. Text descriptions are consistent. Photos show you exactly what the section looks like, including how wide the path is, how close the drop-off is, and what the terrain on either side looks like. Check photos from the last 30 days if available.
The questions to answer before hiking exposed terrain
Three questions that make trail exposure safety planning concrete:
1. What is the widest the trail gets at the exposed section? AllTrails photos and recent trip reports answer this. 12 inches is narrow. 3 feet is manageable. 6 feet is wide. Many ridge traverses that sound terrifying in text are 4 to 6 feet wide.
2. What is the consequence of a slip? A 30-foot drop on loose shale is more dangerous than a 100-foot drop onto a wide ledge you’d land on rather than fall past. The raw height number matters less than what’s immediately below.
3. How long is the exposed section? A 50-foot traverse is a different experience from a half-mile exposed ridge. Knowing the length tells you whether you’re committing to a brief moment of discomfort or a sustained period of focus.
The National Park Service provides trail safety information for its parks at nps.gov. For national forest trails, the USDA Forest Service publishes trail condition updates at fs.usda.gov. Both are more current than third-party apps.
Common Mistakes on Exposed Trail Sections
Committing to exposure without checking the specific photos
The most consistent beginner error with exposed trail meaning hiking: reading the difficulty rating and ignoring what the exposure description actually says. AllTrails rates trails on length, elevation gain, and route complexity. Exposure is listed separately. A trail can be rated Moderate on all standard metrics and still have a section that stops most beginners cold.
Check every trip report that mentions exposed sections. Sort AllTrails reviews by newest first and look for specific mentions. “A little exposed but fine” and “extremely scary, gripped the rocks the whole way” are both reviews of trails AllTrails may rate identically.
Moving too fast on exposed sections
Speed on an exposed trail section is the variable that turns manageable into dangerous. Experienced hikers move quickly through exposed terrain because they’ve built confidence through repetition. Beginners moving at normal hiking pace on a narrow exposed section are more likely to make a footing error because they haven’t built the slower, deliberate foot-placement habit that technical terrain requires.
The rule on any exposed section: slow to the pace where you’re looking at your next two foot placements before you lift your current foot. That pace feels extremely slow. It’s the right pace.
Looking at the drop instead of the path
On a narrow section with vertical exposure, where your eyes go matters. Hikers who focus on the drop to their right are unconsciously orienting their body toward it and destabilizing balance. Hikers who focus on the path ahead maintain stable body position.
This sounds simple and is harder in practice. The drop is what your instincts monitor. Overriding that instinct is a skill experienced scramblers have built through repetition. For a first time on exposed trail, the instruction is specific: find a fixed point on the path 6 to 10 feet ahead and keep your eyes there, not on the exposure.
Not knowing when to turn around
Trail exposure safety requires a clear personal threshold for turning around. The decision point is before the exposed section, not during it. If you arrive at the start of an exposed section and feel physical reluctance that isn’t moving toward manageable as you study the terrain, turn around then. Not after two steps. Not at the midpoint. The start of the section is where you have full decision-making capacity and all your options.
The Fama rule for exposed sections: if your body says no before you’ve taken a step onto it, trust that. The same trail will be there next month.
When to Change Your Plan or Turn Around
🔴 Turn Around Now
- You arrive at an exposed section and feel physically frozen before stepping onto it
- Wind is strong enough to affect your balance (steady wind above 25mph is meaningful on a narrow ridge)
- You can see weather building above the ridge or summit
- A hiking partner shows clear distress before the section begins
- It’s past noon on a summer alpine route and thunderstorm clouds are visible anywhere on the horizon
🟡 Slow Down and Reassess
- You’re on the exposed section and feel uncomfortable but are still moving deliberately
- Your pace has dropped significantly but your footing is controlled
- You’re choosing rest points and resuming with intention
✅ You’re Managing Well
- You’re moving at a deliberate pace, focusing on foot placements, not the exposure
- Your breathing has settled into a workable rhythm
- You’re making active decisions about footing rather than reacting
The one rule for elemental exposure and weather: if you can hear thunder anywhere while above treeline, descend below treeline immediately. The National Park Service publishes specific lightning safety guidance at nps.gov for anyone heading into alpine terrain.
What does exposed trail meaning in hiking actually refer to?
Exposed trail meaning hiking refers to sections of trail that leave you vulnerable to either vertical drop-offs on one or both sides, open weather with no tree cover, or both simultaneously. The word appears in trail descriptions to signal that the trail has less protection than typical maintained paths. It does not automatically mean dangerous. Most exposed sections on maintained trails in the US are safely hikeable with deliberate movement and appropriate preparation. What exposed trail meaning hiking does mean is that those sections require more focus than shaded woodland trails.
Are exposed hiking trails beginners should avoid a real category?
Yes. Exposed hiking trails beginners should avoid include trails with sustained ridge traverses above 200 feet of vertical exposure, scrambling sections requiring hands-and-feet movement above significant drops, and above-treeline routes where afternoon thunderstorms are documented with no quick descent option. The distinction is between trails beginners can approach gradually and those that require technical confidence built over multiple seasons. Most national park trails rated “moderate” by their land managers fall into the first category.
What does high exposure mean hiking and how is it different from regular exposure?
What does high exposure mean hiking describes trail sections where a fall would be fatal or cause severe injury, with no margin for error. Standard exposed trail meaning hiking on maintained day hike trails means drop-offs that are real but survivable in many scenarios. High exposure in the technical sense belongs to alpine and mountaineering terrain. For beginner hikers, the practical difference is this: trails described as exposed in AllTrails guides are usually manageable with preparation. Trails where trip reports use “high exposure” or “airy” technically require specific skills and are outside beginner scope.
How should I handle hiking fear of heights on an exposed section?
Hiking fear of heights on exposed terrain has a better response to specific techniques than to general reassurance. Keep your eyes on a fixed point on the path ahead, not on the drop. Slow your pace to the speed where you’re placing each foot deliberately. Control your breathing: 4 counts in, 4 counts out. Move in short planned segments rather than looking at the full exposed section at once. If you feel physically frozen, stop in a stable position, breathe, and decide whether to continue or reverse. Never rush an exposed section. Trail exposure safety depends on deliberate movement.
How do I find out if a trail has exposed sections before I hike it?
Check AllTrails photos from the last 30 days on the specific trail page. Photos show what text descriptions don’t: actual path width, actual drop-off character, what the terrain looks like underfoot. Read trip reports sorted by newest first and look for specific mentions of exposed sections. Check the National Park Service trail page at nps.gov for parks, or the USDA Forest Service site at fs.usda.gov for national forest trails. For any trail described as exposed, search specifically for photos of that section, not just summit views.
What is the safest way to build up to exposed hiking trails as a beginner?
Trail exposure safety for beginners builds best through deliberate progression. Start with trails that have minor exposure: a short section with a modest drop-off, well below your threshold. Repeat similar trails until that exposure level feels routine. Then step up to moderate exposure. The progression works best over several months because confidence on exposed terrain is built through accumulated experience, not a single successful crossing. The American Hiking Society notes that building trail skills progressively is the most reliable approach to reducing incident risk for newer hikers.
Exposure Is a Real Variable, Not Just a Warning Label
Exposed trail meaning hiking is not hype in a trail description. The word is there because the section it describes requires something different from a shaded woodland path.
That difference, which is what exposed trail meaning hiking comes down to in practice, is not insurmountable. Most exposed sections on maintained day hike trails in the US are safely hikeable by beginners who know what to expect, move deliberately, and make the turn-around decision before they need to rather than after. The people who struggle on exposed terrain aren’t usually those who lack fitness or experience. They’re the ones who showed up without knowing what the word meant and found out mid-ridge.
Check the photos before you go. Know which type of exposure you’re dealing with. Have the turn-around decision made before you reach the section.
Next Steps
- Right now: Pull up any exposed trail you’re considering on AllTrails, sort reviews by newest, and look specifically for photos of the exposed sections. That 2-minute check shows you exactly what you’re agreeing to.
- Before your first exposed hike: Identify the specific exposed section on the map and check its length. Know the distance you’re committing to before you step onto it.
- On trail: Decide your turn-around threshold before you reach the exposed section, not at it. The start of the section is the right place to make that call.
Frequently Asked Questions
Is an exposed trail dangerous?
It can be dangerous for those with a fear of heights or during poor weather conditions like high winds or ice. Proper footwear and focus are required.
What is a knife edge on a hike?
A knife edge is a highly exposed, very narrow ridge with steep drop-offs on both sides, requiring you to walk carefully along the center point.
Related Reads
Looked at a loop trail map and had no idea whether to start with the climb or the descent? Here’s the real answer on hiking uphill or downhill first, and the logic behind it might surprise you.
Wondered why a steep trail zigzags back and forth instead of just charging straight up the hillside? Here’s what switchbacks are actually doing for you beyond just making the climb look longer.
Picked a hiking distance because it was the only option your friends suggested, not because it actually fit you? These 5 rules help you push for a number that’s realistic for you, no awkward conversation required.
Trusted an app’s “easy” tag and still ended up stopping every few minutes to catch your breath? Here’s how AllTrails actually builds those difficulty ratings, and why the label doesn’t always match what you’ll feel out there.
Glanced at a trailhead sign with a rating system that meant absolutely nothing to you? Here’s what those difficulty ratings genuinely mean for someone brand new, explained without any of the confusing jargon.